Quantcast
Channel: Lingesh, Author at UnixArena
Viewing all 369 articles
Browse latest View live

How to clone a KVM virtual Machines and reset the VM – Part 6

$
0
0

If you want to build several VMs with the same OS and configuration, “CLONE ” is the best method to save the time instead of installing operating system on each virtual machines. “virt-clone” is useful binary tool to clone the virtual machines with unique ID and  MAC address (When you clone from existing virtual machine). To perform the clone, virtual machine should be in powered off state. You need to perform the host configuration for new VM after the build using Virt-sysprep.


Clone the VM:


1.Login to the KVM host or Management node.

2.List the running VM.

[root@UA-HA ~]# virsh list
 Id    Name                           State
----------------------------------------------------
 18    UAKVM2                         running

[root@UA-HA ~]#


3.Suspend the source virtual machine. This is a requirement since it ensures that all data and network I/O on the VM is stopped. You can also shutdown the VM .

[root@UA-HA ~]# virsh suspend UAKVM2
Domain UAKVM2 suspended

[root@UA-HA ~]# virsh list
 Id    Name                           State
----------------------------------------------------
 18    UAKVM2                         paused
[root@UA-HA ~]#


4. Clone the virtual machine.

[root@UA-HA ~]# virt-clone --connect qemu:///system --original UAKVM2 --name UACLONE --file /var/lib/libvirt/images/UACLONE.qcow2
WARNING  Setting the graphics device port to autoport, in order to avoid conflicting.
Allocating 'UACLONE.qcow2'               100% [===================================================]  12 MB/s | 4.0 GB  00:01:19
Clone 'UACLONE' created successfully.
[root@UA-HA ~]#
=================================================|
Options    |  Value   | Description              |
=================================================|
--original | UAKVM2   | Source Virutal Machine   |
--name     | UACLONE  | New Virtual Machine Name |
--file     | File_path| New virtual Disk Path    |
--connect  | qemu:///system | Connect to the KVM hypervisor |
==================================================


5. Resume the source virtual Machine.

[root@UA-HA ~]# virsh resume UAKVM2
Domain UAKVM2 resumed
[root@UA-HA ~]#
[root@UA-HA ~]#
[root@UA-HA ~]# virsh list --all
 Id    Name                           State
----------------------------------------------------
 18    UAKVM2                         running
 -     UACLONE                        shut off
[root@UA-HA ~]#


We have successfully clone the existing virtual machine to new VM.  But the newly cloned virtual machine will still have the config (Ex: IP , Hostname ) of source machine which needs to be removed.


virt-sysprep:  Prepare the VM:

Virt-sysprep resets or un-configures a virtual machine to Fresh OS installation state.  Virt-sysprep removes SSH host keys,  persistent network MAC configuration, hostname and user accounts. Each step can be enabled or disabled as required. Virt-sysprep modifies the guest or disk image without booting the VM.


Decontextualize the image – Reset or Un-configure the VM

[root@UA-HA ~]# virt-sysprep -d UACLONE
[   0.0] Examining the guest ...

[ 171.0] Performing "abrt-data" ...
[ 171.0] Performing "bash-history" ...
[ 171.0] Performing "blkid-tab" ...
[ 171.0] Performing "crash-data" ...
[ 171.0] Performing "cron-spool" ...
[ 171.0] Performing "dhcp-client-state" ...
[ 171.0] Performing "dhcp-server-state" ...
[ 171.0] Performing "dovecot-data" ...
[ 171.0] Performing "logfiles" ...
[ 172.0] Performing "machine-id" ...
[ 172.0] Performing "mail-spool" ...
[ 172.0] Performing "net-hostname" ...
[ 172.0] Performing "net-hwaddr" ...
[ 172.0] Performing "pacct-log" ...
[ 172.0] Performing "package-manager-cache" ...
[ 172.0] Performing "pam-data" ...
[ 172.0] Performing "puppet-data-log" ...
[ 172.0] Performing "rh-subscription-manager" ...
[ 172.0] Performing "rhn-systemid" ...
[ 172.0] Performing "rpm-db" ...
[ 172.0] Performing "samba-db-log" ...
[ 172.0] Performing "script" ...
[ 172.0] Performing "smolt-uuid" ...
[ 172.0] Performing "ssh-hostkeys" ...
[ 172.0] Performing "ssh-userdir" ...
[ 172.0] Performing "sssd-db-log" ...
[ 172.0] Performing "tmp-files" ...
[ 172.0] Performing "udev-persistent-net" ...
[ 172.0] Performing "utmp" ...
[ 172.0] Performing "yum-uuid" ...
[ 172.0] Performing "customize" ...
[ 172.0] Setting a random seed
[ 173.0] Performing "lvm-uuids" ...
[root@UA-HA ~]#
[root@UA-HA ~]#


Have a look at the following command output to know what are the operations has been performed by virt-sysprep tool.

[root@UA-HA ~]# virt-sysprep –list-operations
[root@UA-HA ~]# virt-sysprep --list-operations
abrt-data * Remove the crash data generated by ABRT
bash-history * Remove the bash history in the guest
blkid-tab * Remove blkid tab in the guest
ca-certificates   Remove CA certificates in the guest
crash-data * Remove the crash data generated by kexec-tools
cron-spool * Remove user at-jobs and cron-jobs
customize * Customize the guest
dhcp-client-state * Remove DHCP client leases
dhcp-server-state * Remove DHCP server leases
dovecot-data * Remove Dovecot (mail server) data
firewall-rules   Remove the firewall rules
flag-reconfiguration   Flag the system for reconfiguration
fs-uuids   Change filesystem UUIDs
kerberos-data   Remove Kerberos data in the guest
logfiles * Remove many log files from the guest
lvm-uuids * Change LVM2 PV and VG UUIDs
machine-id * Remove the local machine ID
mail-spool * Remove email from the local mail spool directory
net-hostname * Remove HOSTNAME in network interface configuration
net-hwaddr * Remove HWADDR (hard-coded MAC address) configuration
pacct-log * Remove the process accounting log files
package-manager-cache * Remove package manager cache
pam-data * Remove the PAM data in the guest
puppet-data-log * Remove the data and log files of puppet
rh-subscription-manager * Remove the RH subscription manager files
rhn-systemid * Remove the RHN system ID
rpm-db * Remove host-specific RPM database files
samba-db-log * Remove the database and log files of Samba
script * Run arbitrary scripts against the guest
smolt-uuid * Remove the Smolt hardware UUID
ssh-hostkeys * Remove the SSH host keys in the guest
ssh-userdir * Remove ".ssh" directories in the guest
sssd-db-log * Remove the database and log files of sssd
tmp-files * Remove temporary files
udev-persistent-net * Remove udev persistent net rules
user-account   Remove the user accounts in the guest
utmp * Remove the utmp file
yum-uuid * Remove the yum UUID
[root@UA-HA ~]#


virt-sysprep Options:

Virt-sysprep provides the additional option to configure the VM or template.

 -a file                             Add disk image file
  --add file                          Add disk image file
  -c uri                              Set libvirt URI
  --chmod PERMISSIONS:FILE            Change the permissions of a file
  --connect uri                       Set libvirt URI
  -d domain                           Set libvirt guest name
  --debug-gc                          Debug GC and memory allocations (internal)
  --delete PATH                       Delete a file or directory
  --domain domain                     Set libvirt guest name
  --dry-run                           Perform a dry run
  --dryrun                            Perform a dry run
  --dump-pod                          Dump POD (internal)
  --dump-pod-options                  Dump POD for options (internal)
  --edit FILE:EXPR                    Edit file using Perl expression
  --enable operations                 Enable specific operations
  --firstboot SCRIPT                  Run script at first guest boot
  --firstboot-command 'CMD+ARGS'      Run command at first guest boot
  --firstboot-install PKG,PKG..       Add package(s) to install at first boot
  --format format                     Set format (default: auto)
  --hostname HOSTNAME                 Set the hostname
  --install PKG,PKG..                 Add package(s) to install
  --keep-user-accounts users          Users to keep
  --link TARGET:LINK[:LINK..]         Create symbolic links
  --list-operations                   List supported operations
  --long-options                      List long options
  --mkdir DIR                         Create a directory
  --mount-options opts                Set mount options (eg /:noatime;/var:rw,noatime)
  -n                                  Perform a dry run
  --no-logfile                        Scrub build log file
  --no-selinux-relabel                Compatibility option, does nothing
  --operation                         Enable/disable specific operations
  --operations                        Enable/disable specific operations
  --password USER:SELECTOR            Set user password
  --password-crypto md5|sha256|sha512 Set password crypto
  -q                                  Don't print log messages
  --quiet                             Don't print log messages
  --remove-user-accounts users        Users to remove
  --root-password SELECTOR            Set root password
  --run SCRIPT                        Run script in disk image
  --run-command 'CMD+ARGS'            Run command in disk image
  --script script                     Script or program to run on guest
  --scriptdir dir                     Mount point on host
  --scrub FILE                        Scrub a file
  --selinux-relabel                   Relabel files with correct SELinux labels
  --timezone TIMEZONE                 Set the default timezone
  --update                            Update core packages
  --upload FILE:DEST                  Upload local file to destination
  -v                                  Enable debugging messages
  -V                                  Display version and exit
  --verbose                           Enable debugging messages
  --version                           Display version and exit
  --write FILE:CONTENT                Write file
  -x                                  Enable tracing of libguestfs calls
  -help                               Display this list of options
  --help                              Display this list of options


Let’s set the root password and hostname using virt-sysprep.

[root@UA-HA ~]# virt-sysprep -d UACLONE  --hostname UACLONE --root-password password:123456
[   0.0] Examining the guest ...
[  32.0] Performing "abrt-data" ...
[  32.0] Performing "bash-history" ...
[  32.0] Performing "blkid-tab" ...
[  32.0] Performing "crash-data" ...
[  32.0] Performing "cron-spool" ...
[  32.0] Performing "dhcp-client-state" ...
[  32.0] Performing "dhcp-server-state" ...
[  32.0] Performing "dovecot-data" ...
[  32.0] Performing "logfiles" ...
[  33.0] Performing "machine-id" ...
[  33.0] Performing "mail-spool" ...
[  33.0] Performing "net-hostname" ...
[  33.0] Performing "net-hwaddr" ...
[  33.0] Performing "pacct-log" ...
[  33.0] Performing "package-manager-cache" ...
[  33.0] Performing "pam-data" ...
[  33.0] Performing "puppet-data-log" ...
[  33.0] Performing "rh-subscription-manager" ...
[  33.0] Performing "rhn-systemid" ...
[  33.0] Performing "rpm-db" ...
[  33.0] Performing "samba-db-log" ...
[  33.0] Performing "script" ...
[  33.0] Performing "smolt-uuid" ...
[  33.0] Performing "ssh-hostkeys" ...
[  33.0] Performing "ssh-userdir" ...
[  33.0] Performing "sssd-db-log" ...
[  33.0] Performing "tmp-files" ...
[  33.0] Performing "udev-persistent-net" ...
[  33.0] Performing "utmp" ...
[  33.0] Performing "yum-uuid" ...
[  33.0] Performing "customize" ...
[  33.0] Setting a random seed
[  33.0] Setting the hostname: UACLONE
[  33.0] Setting passwords
[  36.0] Performing "lvm-uuids" ...
[root@UA-HA ~]#


Power on the VM:

1. Power on the New VM

[root@UA-HA ~]# virsh list --all
 Id    Name                           State
----------------------------------------------------
 18    UAKVM2                         running
 -     UACLONE                        shut off
[root@UA-HA ~]# virsh start UACLONE
Domain UACLONE started

[root@UA-HA ~]#


2. check the VM’s status

[root@UA-HA ~]# virsh list
 Id    Name                           State
----------------------------------------------------
 18    UAKVM2                         running
 28    UACLONE                        running

[root@UA-HA ~]#


3. Launch virt-viewer to view the UACLONE console.

[root@UA-HA ~]# virt-viewer 28        ------> 28 is VM ID 

** (virt-viewer:10053): WARNING **: Couldn't connect to accessibility bus: Failed to connect to socket /tmp/dbus-6XZ1eVgijP: Connection refused

(virt-viewer:10053): Gdk-CRITICAL **: gdk_window_set_cursor: assertion 'GDK_IS_WINDOW (window)' failed


4. Verify the hostname of UACLONE. You can see that “virt-sysprep” has made the settings.

virt-sysprep - VM changes
virt-sysprep – VM changes


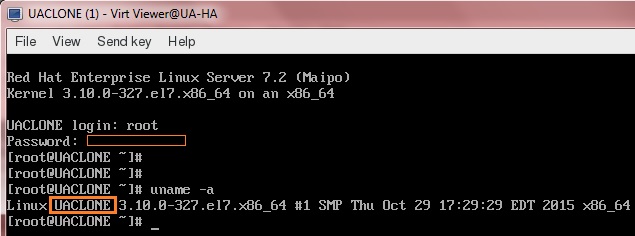
Looks good. We have successfully cloned the existing VM and reset the config of the clone VM using “virt-sysprep”.

Hope this article is informative to you.

The post How to clone a KVM virtual Machines and reset the VM – Part 6 appeared first on UnixArena.


Linux KVM – How to Add/Resize Virtual disk on fly? Part 7

$
0
0

In this article ,we will see that how to add new virtual disk or LUN to the KVM guest and how to resize the existing virtual disk on active domain/guest. This operations can be carried out on fly without any downtime to the guest operating system. KVM supports both physical LUN mapping and virtual disk mapping to the guests. In an order to map the virtual disk , we need to create the virtual disk image file using qemu-img command and disk format can be either “img” or “qcow2”.  You  can also create the non-sparse image file using legacy “dd” command.

Environment:  RHEL 7  KVM Hypervisor


Mapping SAN or SCSI Disks to the KVM Guests:

1.Login to the KVM hypervisor host as root user.

2. Assume that we got “/dev/sdb” LUN from SAN storage to the hypervisor node.

3.List the running virtual machine using virsh command.

[root@UA-HA ~]# virsh list
 Id    Name                           State
----------------------------------------------------
 32    UAKVM2                         running
[root@UA-HA ~]#


4. Identify the existing device mapping for the UAKVM2 guest.

[root@UA-HA ~]# virsh domblklist UAKVM2 --details
Type       Device     Target     Source
------------------------------------------------
file       disk       vda        /var/lib/libvirt/images/UAKVM2.qcow2
block      cdrom      hda        -
[root@UA-HA ~]#


5. Attach the LUN to UAKVM2 virtual KVM guest as vdb device.

[root@UA-HA ~]# virsh attach-disk UAKVM2 --source /dev/sdb --target vdb --persistent
Disk attached successfully
[root@UA-HA ~]#


6. verify our work.

[root@UA-HA ~]# virsh domblklist UAKVM2 --details
Type       Device     Target     Source
------------------------------------------------
file       disk       vda        /var/lib/libvirt/images/UAKVM2.qcow2
block      disk       vdb        /dev/sdb
block      cdrom      hda        -
[root@UA-HA ~]#


7. Login to UAKVM2 KVM guest and check the newly assigned disk.

[root@UA-KVM1 ~]# fdisk -l /dev/vdb

Disk /dev/vdb: 536 MB, 536870912 bytes, 1048576 sectors
Units = sectors of 1 * 512 = 512 bytes
Sector size (logical/physical): 512 bytes / 512 bytes
I/O size (minimum/optimal): 512 bytes / 512 bytes

[root@UA-KVM1 ~]#

We have successfully mapped “/dev/sdb”   SAN LUN to the KVM guest on fly.


Add new virtual Disk to the KVM Guests:

To map the virtual disk to KVM host,

  • Create the new virtual disk using qemu-img command.
  • Attach the virtual disk to the guest domain.


1. Login to UAKVM2 and list the attached disks.

[root@UA-KVM1 ~]# fdisk -l |grep vd |grep -v Linux
Disk /dev/vda: 4294 MB, 4294967296 bytes, 8388608 sectors
Disk /dev/vdb: 536 MB, 536870912 bytes, 1048576 sectors
[root@UA-KVM1 ~]#


2. Login to the KVM hypervisor .


3. Create new virtual disk using qemu-img command.

[root@UA-HA images]# cd /var/lib/libvirt/images
[root@UA-HA images]# qemu-img create -f qcow2 UAKVM2.disk2.qcow2 1G
Formatting 'UAKVM2.disk2.qcow2', fmt=qcow2 size=1073741824 encryption=off cluster_size=65536 lazy_refcounts=off
[root@UA-HA images]#

Note: Storage pool path will not be same on all the environments.

You can also create the virtual disks in following methods.

  • Raw format with thin provisioning:
[root@UA-HA images]# qemu-img create -f raw UAKVM2.disk3.img 256M
Formatting 'UAKVM2.disk3.img', fmt=raw size=268435456
[root@UA-HA images]#
  • Raw format with thick provisioning: (Provides Better Performance since it’s pre-allocated storage)
[root@UA-HA images]# dd if=/dev/zero of=UAKVM2.disk4.img bs=1M count=1000
1000+0 records in
1000+0 records out
1048576000 bytes (1.0 GB) copied, 14.6078 s, 71.8 MB/s
[root@UA-HA images]#


See the virtual disk size in the storage pool.

[root@UA-HA images]# du -sh UAKVM2.disk*
196K    UAKVM2.disk2.qcow2      --- qcow2 formatted virtual disk file (thin)
0       UAKVM2.disk3.img        --- raw  formatted virtual disk file (thin)
1000M   UAKVM2.disk4.img        --- raw  formatted virtual disk file using dd command. 
[root@UA-HA images]#


4. Attach the virtual disk to the KVM guest.

[root@UA-HA images]# virsh attach-disk UAKVM2 --source /var/lib/libvirt/images/UAKVM2.disk2.qcow2 --target vdc --persistent
Disk attached successfully
[root@UA-HA images]#


5. Verify our work.

[root@UA-HA images]# virsh domblklist UAKVM2 --details
Type       Device     Target     Source
------------------------------------------------
file       disk       vda        /var/lib/libvirt/images/UAKVM2.qcow2
block      disk       vdb        /dev/sdb
file       disk       vdc        /var/lib/libvirt/images/UAKVM2.disk2.qcow2
block      cdrom      hda        -
[root@UA-HA images]#


6. Login to the virtual guest (UAKVM2) and check the newly added disk.

[root@UA-KVM1 ~]# fdisk -l /dev/vdc
Disk /dev/vdc: 1073 MB, 1073741824 bytes, 2097152 sectors
Units = sectors of 1 * 512 = 512 bytes
Sector size (logical/physical): 512 bytes / 512 bytes
I/O size (minimum/optimal): 512 bytes / 512 bytes
[root@UA-KVM1 ~]#

We have successfully created the virtual disks and present to the KVM guest on fly.


Resize existing virtual Disks on KVM:

1.Login to the Guest VM (UAKVM2) and identify which disk require to resize.

[root@UA-KVM1 ~]# df -h /orastage
Filesystem      Size  Used Avail Use% Mounted on
/dev/vdc       1014M   33M  982M   4% /orastage
[root@UA-KVM1 ~]# mount -v |grep /orastage
/dev/vdc on /orastage type xfs (rw,relatime,attr2,inode64,noquota)
[root@UA-KVM1 ~]#
[root@UA-KVM1 ~]# fdisk -l /dev/vdc

Disk /dev/vdc: 1073 MB, 1073741824 bytes, 2097152 sectors
Units = sectors of 1 * 512 = 512 bytes
Sector size (logical/physical): 512 bytes / 512 bytes
I/O size (minimum/optimal): 512 bytes / 512 bytes

[root@UA-KVM1 ~]#


2. Login to the KVM hypervisor which hosts the VM


3. Identify the virtual disk mapping for the KVM guest.

[root@UA-HA ~]# virsh domblklist UAKVM2 --details
Type       Device     Target     Source
------------------------------------------------
file       disk       vda        /var/lib/libvirt/images/UAKVM2.qcow2
block      disk       vdb        /dev/sdb
file       disk       vdc        /var/lib/libvirt/images/UAKVM2.disk2.qcow2
block      cdrom      hda        -

[root@UA-HA ~]#


4. Refresh the KVM storage pool.

[root@UA-HA ~]# virsh pool-list
 Name                 State      Autostart
-------------------------------------------
 default              active     yes
 [root@UA-HA ~]#
[root@UA-HA ~]# virsh pool-refresh default
Pool default refreshed
[root@UA-HA ~]#


5. List the virtual disks using virsh-vol list command. (vdc = UAKVM2.disk2.qcow2)

[root@UA-HA ~]# virsh vol-list  default
 Name                 Path
------------------------------------------------------------------------------
 UAKVM2.disk2.qcow2   /var/lib/libvirt/images/UAKVM2.disk2.qcow2
 UAKVM2.disk3.img     /var/lib/libvirt/images/UAKVM2.disk3.img
 UAKVM2.disk4.img     /var/lib/libvirt/images/UAKVM2.disk4.img
 UAKVM2.qcow2         /var/lib/libvirt/images/UAKVM2.qcow2
[root@UA-HA ~]#


6. Use “qemu-monitor” to list the allocated block devices to “UAKVM2” domain.

[root@UA-HA ~]# virsh qemu-monitor-command UAKVM2 --hmp "info block"
drive-virtio-disk0: removable=0 io-status=ok file=/var/lib/libvirt/images/UAKVM2.qcow2 ro=0 drv=qcow2 encrypted=0 bps=0 bps_rd=0 bps_wr=0 iops=0 iops_rd=0 iops_wr=0
drive-virtio-disk1: removable=0 io-status=ok file=/dev/sdb ro=0 drv=raw encrypted=0 bps=0 bps_rd=0 bps_wr=0 iops=0 iops_rd=0 iops_wr=0
drive-virtio-disk2: removable=0 io-status=ok file=/var/lib/libvirt/images/UAKVM2.disk2.qcow2 ro=0 drv=raw encrypted=0 bps=0 bps_rd=0 bps_wr=0 iops=0 iops_rd=0 iops_wr=0
drive-ide0-0-0: removable=1 locked=0 tray-open=0 io-status=ok [not inserted]
[root@UA-HA ~]#

From the above command output, we can see that virtual disk “UAKVM2.disk2.qcow2” is mapped to drive-virtio-disk2.


7. Increase the virtual disk size and intimate the virtio driver about the changes. (Do not reduce the disk size !!!)

[root@UA-HA images]# virsh qemu-monitor-command UAKVM2 --hmp "block_resize drive-virtio-disk2 2G"
[root@UA-HA images]#


8. Login to the KVM guest – UAKVM2 and check the “vdc” disk size.

[root@UA-KVM1 ~]# fdisk -l /dev/vdc

Disk /dev/vdc: 2147 MB, 2147483648 bytes, 4194304 sectors
Units = sectors of 1 * 512 = 512 bytes
Sector size (logical/physical): 512 bytes / 512 bytes
I/O size (minimum/optimal): 512 bytes / 512 bytes

[root@UA-KVM1 ~]#


9. Extend the filesystem. My filesystem type is XFS.

[root@UA-KVM1 ~]# df -h /orastage
Filesystem      Size  Used Avail Use% Mounted on
/dev/vdc       1014M   33M  982M   4% /orastage
[root@UA-KVM1 ~]# mount -v |grep /orastage
/dev/vdc on /orastage type xfs (rw,relatime,attr2,inode64,noquota)
[root@UA-KVM1 ~]#
[root@UA-KVM1 ~]# xfs_growfs /orastage/
meta-data=/dev/vdc               isize=256    agcount=4, agsize=65536 blks
         =                       sectsz=512   attr=2, projid32bit=1
         =                       crc=0        finobt=0
data     =                       bsize=4096   blocks=262144, imaxpct=25
         =                       sunit=0      swidth=0 blks
naming   =version 2              bsize=4096   ascii-ci=0 ftype=0
log      =internal               bsize=4096   blocks=2560, version=2
         =                       sectsz=512   sunit=0 blks, lazy-count=1
realtime =none                   extsz=4096   blocks=0, rtextents=0
data blocks changed from 262144 to 1310720
[root@UA-KVM1 ~]#
[root@UA-KVM1 ~]# df -h /orastage/
Filesystem      Size  Used Avail Use% Mounted on
/dev/vdc        2.0G   33M  2.0G   1% /orastage
[root@UA-KVM1 ~]#

We have successfully resized virtual size and intimated to virtio driver about the changes. No specific instructions required for the VM to see the new disk size.


Hope this article informative to you.

The post Linux KVM – How to Add/Resize Virtual disk on fly? Part 7 appeared first on UnixArena.

Linux KVM – How to add /Remove Memory to Guest on Fly ? Part 8

$
0
0

If application/DB is demanding more  Memory , you need to adjust the VM’s memory limit accordingly. KVM supports dynamic memory addition when you have configured the VM’s with Maximum memory limits. There are two parts in the VM configuration. 1. Maximum Limits 2. current allocation. At any point of time, you can’t exceed the maximum memory  limit using “virsh setmem” command on fly. You need to shut down the guest to perform VM Maximum Memory limit adjustment.


Identify the VM’s Memory Limit and current Memory:

[root@UA-HA ~]# virsh dumpxml  UAKVM2|grep -i memo
VM Configured Memory settings - KVM
VM Configured Memory settings – KVM
[root@UA-HA ~]#


As per above command out,

Allocated memory to VM: 1GB  (Current Memory Unit)
Maximum Memory Limit : 2.5GB  (Memory Unit)
(Using “virsh setmem” command, we can increase the allocated memory to 3GB on fly but not more than that.)

Note: VM can only see the “currentMemory Unit” value.


Resize RAM/Memory on Running VM: 

1. Login to the KVM guest and see the currently allocated & used memory.

[root@UA-KVM1 ~]# free -m
              total        used        free      shared  buff/cache   available
Mem:           1001          78         780           6         141         787
Swap:           411           0         411
[root@UA-KVM1 ~]#


2.Login to the KVM host as root.

3.List the KVM guest and see the domain configuration.

[root@UA-HA ~]# virsh dominfo UAKVM2
Id:             34
Name:           UAKVM2
UUID:           6013be3b-08f9-4827-83fb-390bd5a86de6
OS Type:        hvm
State:          running
CPU(s):         1
CPU time:       318.4s
Max memory:     2621440 KiB
Used memory:    1048576 KiB
Persistent:     yes
Autostart:      disable
Managed save:   no
Security model: selinux
Security DOI:   0
Security label: system_u:system_r:svirt_t:s0:c361,c741 (permissive)

[root@UA-HA ~]#


4.Reduce the memory to 512MB.

[root@UA-HA ~]# virsh setmem UAKVM2 512M

[root@UA-HA ~]# virsh dominfo UAKVM2
Id:             34
Name:           UAKVM2
UUID:           6013be3b-08f9-4827-83fb-390bd5a86de6
OS Type:        hvm
State:          running
CPU(s):         1
CPU time:       320.2s
Max memory:     2621440 KiB
Used memory:    524288 KiB
Persistent:     yes
Autostart:      disable
Managed save:   no
Security model: selinux
Security DOI:   0
Security label: system_u:system_r:svirt_t:s0:c361,c741 (permissive)

[root@UA-HA ~]#

Check in the KVM guest,

[root@UA-KVM1 ~]# free -m
              total        used        free      shared  buff/cache   available
Mem:            479          78         259           6         141         266
Swap:           411           0         411
[root@UA-KVM1 ~]#

Same way you can increase the virtual machine memory.

[root@UA-HA ~]# virsh setmem UAKVM2 2048M

[root@UA-HA ~]# virsh dominfo UAKVM2
Id:             36
Name:           UAKVM2
UUID:           6013be3b-08f9-4827-83fb-390bd5a86de6
OS Type:        hvm
State:          running
CPU(s):         1
CPU time:       56.0s
Max memory:     2621440 KiB
Used memory:    2097152 KiB
Persistent:     yes
Autostart:      disable
Managed save:   no
Security model: selinux
Security DOI:   0
Security label: system_u:system_r:svirt_t:s0:c305,c827 (permissive)

[root@UA-HA ~]#


5. You must edit the VM configuration to preserve the memory settings across the VM power OFF/ ON .

Method:1  – Use config option

[root@UA-HA ~]# virsh setmem UAKVM2 2048M --config


Method:2 – Use virsh edit to update XML file.

[root@UA-HA ~]# virsh edit UAKVM2
Edit VM Memory - KVM
Edit VM Memory – KVM
Save & Exit. (:wq)
Domain UAKVM2 XML configuration edited.
[root@UA-HA ~]#

I have modified the “CurrentMemory” from “1048576KB” to “2621440KB” .


How to increase the Memory Limit for VM ?

When you tried to cross the configured VM memory limit, you will get error like below. (error: invalid argument: cannot set memory higher than max memory)

Note: This is not bug.

[root@UA-HA ~]# virsh setmem UAKVM2 4G
error: invalid argument: cannot set memory higher than max memory
[root@UA-HA ~]#

“virsh setmem” command can work within the configured memory limit and it can’t cross the border.


1. To increase the memory limit, you must stop the VM.

[root@UA-HA ~]# virsh shutdown UAKVM2
[root@UA-HA ~]# virsh list --all
 Id    Name                           State
----------------------------------------------------
 -     UAKVM2                         shut off

[root@UA-HA ~]#


2. Increase the VM memory limit to the desired size. (Note: We are just setting the maximum limit to the VM.)

[root@UA-HA ~]# virsh setmaxmem UAKVM2 4G


3.Start the VM .

[root@UA-HA ~]# virsh start UAKVM2
[root@UA-HA ~]# virsh list --all
 Id    Name                           State
----------------------------------------------------
 37    UAKVM2                         running

[root@UA-HA ~]#


4. Login to the KVM guest “UAKVM2” and check current memory size.

[root@UA-KVM1 ~]# free -m
              total        used        free      shared  buff/cache   available
Mem:            719          90         502           8         126         473
Swap:           411           0         411
[root@UA-KVM1 ~]#


5. Let’s increase the allocated memory to 3GB.

[root@UA-HA ~]# virsh setmem UAKVM2 3G

[root@UA-HA ~]#


6. Verify the allocated memory from guest.

[root@UA-KVM1 ~]# free -m
              total        used        free      shared  buff/cache   available
Mem:           2767          90        2544           8         132        2518
Swap:           411           0         411
[root@UA-KVM1 ~]#


7. Update the VM config.

Method:1  – Use config option

[root@UA-HA ~]# virsh setmem UAKVM2 3G --config


Method:2 – Edit the VM XML file to update the new currentMemmory value to 3GB .

[root@UA-HA ~]# virsh edit UAKVM2
Edit VM config - KVM
Edit VM config – KVM


We have successfully  increased the allocated memory and Maximum memory limit for KVM guest.


Hope this article is informative to you. Share it ! Comment it !! Be Sociable !!!

The post Linux KVM – How to add /Remove Memory to Guest on Fly ? Part 8 appeared first on UnixArena.

Linux KVM – How to add /Remove vCPU to Guest on fly ? Part 9

$
0
0

Does KVM support vCPU  hot-plug  ?  Will Linux KVM guest can recognize the newly added vCPU’s ? The answer is “YES” off-course. Like KVM memory management, you can add/remove  vCPU’s to active VM using “virsh” command. But this works if you have configured the KVM guest with Maximum vCPUs parameter. So while deploying the new virtual machines , you should always consider this parameter as prerequisite.There is no harm specifying the maximum vCPU’s to KVM guest since is going to use only the allocated vCPU  (vcpu placement=’static’ current=’N’) .


Understand the VM’s vCPU configuration:

1.List the configured VM’s on KVM host.

[root@UA-HA ~]# virsh list  --all
 Id    Name                           State
----------------------------------------------------
  -     UAKVM2                         shut off

[root@UA-HA ~]#


2.Check the current VM configuration.

KVM Guest vCPU Limits

As per the above screenshot, this VM is privileged to use 1 vCPU  and you can add one more vCPU using “virsh vsetcpus” command on fly. But you can’t increase the vCPU more than 2 on running VM.


3. Let’s power on the VM.

[root@UA-HA ~]# virsh start UAKVM2
Domain UAKVM2 started

[root@UA-HA ~]#


4. Login to the KVM guest and check the allocated vCPU count.

[root@UA-KVM1 ~]# lscpu
Architecture:          x86_64
CPU op-mode(s):        32-bit, 64-bit
Byte Order:            Little Endian
CPU(s):                1
On-line CPU(s) list:   0
Thread(s) per core:    1
Core(s) per socket:    1
Socket(s):             1
NUMA node(s):          1
Vendor ID:             GenuineIntel
CPU family:            6
Model:                 44
Model name:            Westmere E56xx/L56xx/X56xx (Nehalem-C)
Stepping:              1
CPU MHz:               2594.058
BogoMIPS:              5188.11
Hypervisor vendor:     KVM
Virtualization type:   full
L1d cache:             32K
L1i cache:             32K
L2 cache:              4096K
NUMA node0 CPU(s):     0
[root@UA-KVM1 ~]#


Increase the vCPU on Running KVM Guest:

Let’s increase the vCPU count from 1 to 2.

1. Switch to the KVM host and increase the vCPU from 1 to 2 using virsh command.

[root@UA-HA ~]# virsh setvcpus UAKVM2 2

[root@UA-HA ~]# virsh dominfo UAKVM2
Id:             38
Name:           UAKVM2
UUID:           6013be3b-08f9-4827-83fb-390bd5a86de6
OS Type:        hvm
State:          running
CPU(s):         2
CPU time:       51.5s
Max memory:     1048576 KiB
Used memory:    1048576 KiB
Persistent:     yes
Autostart:      disable
Managed save:   no
Security model: selinux
Security DOI:   0
Security label: system_u:system_r:svirt_t:s0:c709,c868 (permissive)
[root@UA-HA ~]#


2. Go back to KVM guest and check the newly added vCPU. VM will switch to “SMP code (symmetric multiprocessor)” from “UP code(uniprocessor)” .

[root@UA-KVM1 ~]# tail -f /var/log/messages
Dec 16 12:48:28 UA-KVM1 kernel: CPU1 has been hot-added
Dec 16 12:48:28 UA-KVM1 kernel: SMP alternatives: switching to SMP code
Dec 16 12:48:57 UA-KVM1 kernel: smpboot: Booting Node 0 Processor 1 APIC 0x1
Dec 16 12:48:57 UA-KVM1 kernel: kvm-clock: cpu 1, msr 0:3ff87041, secondary cpu clock
Dec 16 12:48:57 UA-KVM1 kernel: TSC synchronization [CPU#0 -> CPU#1]:
Dec 16 12:48:57 UA-KVM1 kernel: Measured 906183720569 cycles TSC warp between CPUs, turning off TSC clock.
Dec 16 12:48:57 UA-KVM1 kernel: tsc: Marking TSC unstable due to check_tsc_sync_source failed
Dec 16 12:48:57 UA-KVM1 kernel: KVM setup async PF for cpu 1
Dec 16 12:48:57 UA-KVM1 kernel: kvm-stealtime: cpu 1, msr 3fd0d240
Dec 16 12:48:57 UA-KVM1 kernel: microcode: CPU1 sig=0x206c1, pf=0x1, revision=0x1
Dec 16 12:48:57 UA-KVM1 kernel: Will online and init hotplugged CPU: 1
[root@UA-KVM1 ~]# lscpu
Architecture:          x86_64
CPU op-mode(s):        32-bit, 64-bit
Byte Order:            Little Endian
CPU(s):                2
On-line CPU(s) list:   0,1
Thread(s) per core:    1
Core(s) per socket:    1
Socket(s):             2
NUMA node(s):          1
Vendor ID:             GenuineIntel
CPU family:            6
Model:                 44
Model name:            Westmere E56xx/L56xx/X56xx (Nehalem-C)
Stepping:              1
CPU MHz:               2594.058
BogoMIPS:              5188.11
Hypervisor vendor:     KVM
Virtualization type:   full
L1d cache:             32K
L1i cache:             32K
L2 cache:              4096K
NUMA node0 CPU(s):     0,1
[root@UA-KVM1 ~]#


3. Save the VM configuration if you want to make this changes persistent.

[root@UA-HA ~]# virsh setvcpus UAKVM2 2 --config

[root@UA-HA ~]#

We have successfully added one vCPU to the KVM guest on fly and made it persistent.


Remove the vCPU from Live KVM Guest:

There is no direct method to remove the vCPU’s from the KVM guest. But you can bring back the CPU core power to the KVM hosts by disabling the CPU core.

1. Login to the KVM host as root user.

2. Assuming that there are two active vCPU’s on KVM guest UAKVM2.

3. Do not use following command to remove the vCPU. You might get error like ” error: internal error: cannot change vcpu count of this domain ”

[root@UA-HA ~]# virsh setvcpus UAKVM2 1
error: internal error: cannot change vcpu count of this domain

[root@UA-HA ~]#


Use the following command to reduce the vCPU count on UAKVM2. (Reducing the vCPU to 1 from 2)

[root@UA-HA ~]# virsh setvcpus --live --guest UAKVM2 1
[root@UA-HA ~]#


4. Save the VM config.

[root@UA-HA ~]# virsh setvcpus --config UAKVM2 1

[root@UA-HA ~]#


5. Login to the KVM guest “UAKVM2” and verify.

[root@UA-KVM1 ~]# tail -f /var/log/messages
Dec 16 13:01:01 UA-KVM1 systemd: Starting Session 2 of user root.
Dec 16 13:19:08 UA-KVM1 kernel: Unregister pv shared memory for cpu 1
Dec 16 13:19:08 UA-KVM1 kernel: smpboot: CPU 1 is now offline
[root@UA-KVM1 ~]# lscpu
Architecture:          x86_64
CPU op-mode(s):        32-bit, 64-bit
Byte Order:            Little Endian
CPU(s):                2
On-line CPU(s) list:   0
Off-line CPU(s) list:  1
Thread(s) per core:    1
Core(s) per socket:    1
Socket(s):             1
NUMA node(s):          1
Vendor ID:             GenuineIntel
CPU family:            6
Model:                 44
Model name:            Westmere E56xx/L56xx/X56xx (Nehalem-C)
Stepping:              1
CPU MHz:               2594.058
BogoMIPS:              5188.11
Hypervisor vendor:     KVM
Virtualization type:   full
L1d cache:             32K
L1i cache:             32K
L2 cache:              4096K
NUMA node0 CPU(s):     0
[root@UA-KVM1 ~]#

Note:

In KVM host, You might still see the two allocated vCPU’s to guest UAKVM2. But this will change when you power cycle the VM.

[root@UA-HA ~]# virsh dominfo UAKVM2
Id:             38
Name:           UAKVM2
UUID:           6013be3b-08f9-4827-83fb-390bd5a86de6
OS Type:        hvm
State:          running
CPU(s):         2
CPU time:       90.4s
Max memory:     1048576 KiB
Used memory:    1048576 KiB
Persistent:     yes
Autostart:      disable
Managed save:   no
Security model: selinux
Security DOI:   0
Security label: system_u:system_r:svirt_t:s0:c709,c868 (permissive)

[root@UA-HA ~]#


Just shutdown “UAKVM2” KVM guest to verify it.

[root@UA-HA ~]# virsh destroy UAKVM2
Domain UAKVM2 destroyed

[root@UA-HA ~]# virsh dominfo UAKVM2
Id:             -
Name:           UAKVM2
UUID:           6013be3b-08f9-4827-83fb-390bd5a86de6
OS Type:        hvm
State:          shut off
CPU(s):         1
Max memory:     1048576 KiB
Used memory:    0 KiB
Persistent:     yes
Autostart:      disable
Managed save:   no
Security model: selinux
Security DOI:   0

[root@UA-HA ~]#

We can see that vCPU has been changed to “One” .


Most of the people will try to add more vCPU’s than configured limits and that will result the following error.
(error: invalid argument: requested vcpus is greater than max allowable vcpus for the domain )

[root@UA-HA ~]# virsh setvcpus UAKVM2 3
error: invalid argument: requested vcpus is greater than max allowable vcpus for the domain: 3 > 2
[root@UA-HA ~]#

Please go back to section – “Understand the VM’s vCPU configuration” step number 2 again. You just can’t exceed the Maximum vCPUs using virsh command. At the same time, Maximum vCPUs can’t be changed at runtime.


How to modify the Maximum vCPU’s per VM ?  (Only Offline Method)

1.Login to the KVM host as root user.

2. Halt the virtual machine gracefully.

[root@UA-HA ~]# virsh list
 Id    Name                           State
----------------------------------------------------
 39    UAKVM2                         running

[root@UA-HA ~]# virsh shutdown UAKVM2
Domain UAKVM2 is being shutdown

[root@UA-HA ~]#


3. Edit the VM configuration like following.  Here I am changing the Maximum vCPU count from 2 to 4 .

Modify the vCPU value - KVM Guest
Modify the vCPU value – KVM Guest


vCPU XML format:

vCPU Format - KVM
vCPU Format – KVM


4. Start the KVM guest “UAKVM2” .

[root@UA-HA ~]# virsh start UAKVM2
Domain UAKVM2 started

[root@UA-HA ~]#


5.Verify the vCPU information for UAKVM2 guest.

[root@UA-HA ~]# virsh vcpuinfo UAKVM2
VCPU:           0
CPU:            1
State:          running
CPU time:       24.0s
CPU Affinity:   yy

[root@UA-HA ~]#

At present , only one vCPU has been allocated to UAKVM2 guest. As we have configured the maximum number of vCPU’s to 4, we can increase the allocated vCPU’s up to 4 on fly.


6. Increase the vCPU to 4 .

[root@UA-HA ~]# virsh setvcpus UAKVM2 4

[root@UA-HA ~]# virsh vcpuinfo UAKVM2
VCPU:           0
CPU:            0
State:          running
CPU time:       27.6s
CPU Affinity:   yy

VCPU:           1
CPU:            0
State:          running
CPU time:       0.4s
CPU Affinity:   yy

VCPU:           2
CPU:            0
State:          running
CPU time:       0.1s
CPU Affinity:   yy

VCPU:           3
CPU:            0
State:          running
CPU time:       0.1s
CPU Affinity:   yy

[root@UA-HA ~]#
[root@UA-HA ~]# virsh setvcpus UAKVM2 4 --config

[root@UA-HA ~]#


7. Login to the KVM guest “UAKVM2” and list the vCPUs

[root@UA-KVM1 ~]# lscpu
Architecture:          x86_64
CPU op-mode(s):        32-bit, 64-bit
Byte Order:            Little Endian
CPU(s):                4
On-line CPU(s) list:   0-3
Thread(s) per core:    1
Core(s) per socket:    1
Socket(s):             4
NUMA node(s):          1
Vendor ID:             GenuineIntel
CPU family:            6
Model:                 44
Model name:            Westmere E56xx/L56xx/X56xx (Nehalem-C)
Stepping:              1
CPU MHz:               2594.058
BogoMIPS:              5188.11
Hypervisor vendor:     KVM
Virtualization type:   full
L1d cache:             32K
L1i cache:             32K
L2 cache:              4096K
NUMA node0 CPU(s):     0-3
[root@UA-KVM1 ~]#


We have successfully increased the maximum vCPU’s limit in offline and increased the allocated vCPU on running VM.


Hope this article is informative to you. Share it ! Comment it !! Be Sociable !!!

The post Linux KVM – How to add /Remove vCPU to Guest on fly ? Part 9 appeared first on UnixArena.

Linux KVM – Change libvirt VM image store path – Part 10

$
0
0

In KVM , VM images are stored in /var/lib/libvirt/images directory by default.  There might be the space limitation since /var filesystem lives under root-vg. In KVM virtualization, everyone would prefer to store VM images in central repository to migrate running VM from one hypervisor to another.  In that case, you need to change the default path for the libvirt images or  you need to mount the volume or NFS share on “/var/lib/libvirt/images” . In this article, we will see that how to modify the default libvirt images path to desired one. In KVM terminology , we will call it  as “storage pool”.


Note: This activity has been  performed on non-selinux Node. If SELINUX is enabled, then you need to modify the context for new storage path accordingly .

[root@UA-HA ~]# getenforce
Disabled
[root@UA-HA ~]#


1.Login to the KVM hypervisor host and stop all the running VM’s.

[root@UA-HA kvmpool]# virsh shutdown UAKVM2
[root@UA-HA kvmpool]#
[root@UA-HA ~]# virsh list --all
 Id    Name                           State
----------------------------------------------------
 -     UAKVM2                         shut off

[root@UA-HA ~]#


2.List the storage pool.

[root@UA-HA ~]# virsh pool-list
 Name                 State      Autostart
-------------------------------------------
 default              active     yes

[root@UA-HA ~]#


3.View the storage pool information.

[root@UA-HA ~]# virsh pool-info default
Name:           default
UUID:           3599dd8a-edef-4c00-9ff5-6d880f1ecb8b
State:          running
Persistent:     yes
Autostart:      yes
Capacity:       17.50 GiB
Allocation:     7.67 GiB
Available:      9.82 GiB

[root@UA-HA ~]#


4. Check the existing storage pool path. (Ignore the syntax)

[root@UA-HA ~]# virsh pool-dumpxml default |grep -i path
    path-/var/lib/libvirt/images-/path
[root@UA-HA ~]#


5. Verify that what are the existing VM images are stored on the default path.

[root@UA-HA ~]# virsh vol-list default |grep "/var/lib/libvirt/images"
 UAKVM2.qcow2         /var/lib/libvirt/images/UAKVM2.qcow2
[root@UA-HA ~]#
[root@UA-HA ~]# virsh vol-list default
 Name                 Path
------------------------------------------------------------------------------
 UAKVM2.qcow2         /var/lib/libvirt/images/UAKVM2.qcow2

[root@UA-HA ~]#


6.Stop the storage pool.

[root@UA-HA ~]# virsh pool-destroy default
Pool default destroyed

[root@UA-HA ~]#


7.Edit the default pool configuration.

KVM storage pool - Linux
KVM storage pool – Linux


8.Start the storage pool.

[root@UA-HA ~]# virsh pool-start default
Pool default started

[root@UA-HA ~]#


9.Verify the storage pool path. (Ignore the syntax)

[root@UA-HA ~]# virsh pool-dumpxml default |grep -i path
    path  /kvmpool path
[root@UA-HA ~]#


10. Move the VM images from old path to new Path.

[root@UA-HA ~]# mv /var/lib/libvirt/images/UAKVM2.qcow2 /kvmpool/
[root@UA-HA ~]#


11. Edit the VM configuration file to update the new storage pool path. (Ignore syntax)

 source file='/kvmpool/UAKVM2.qcow2'


12.Start the KVM guest.

[root@UA-HA kvmpool]# virsh start UAKVM2
Domain UAKVM2 started

[root@UA-HA kvmpool]#


If you get error like below,

” error: Failed to start domain XXXXX
error: unsupported configuration: Unable to find security driver for model selinux ”

Edit the VM configuration file and remove “selinux” line from the XML file (In Bottom) & try to start the VM.

# virsh edit UAKVM2
...................

seclabel type='dynamic' model='selinux' relabel='yes';/seclabel   ----> Remove this line .

Hope this article informative to you. Share it ! Comment it !! Be Sociable !!!

The post Linux KVM – Change libvirt VM image store path – Part 10 appeared first on UnixArena.

Perform Live Migration on Linux KVM – Part 11

$
0
0

In KVM , you can migrate the running virtual machines from one KVM host to another without any downtime. Live migration works well if both the KVM hosts have access to the same storage pool. To make the storage pool accessible  on both the KVM hosts, you need to use NFS or GFS2 filesystem(cluster filesystem). In this example, I am using NFS filesystem to store VM images. During the migration, VM ‘s “In-Memory” content will be copied over to the destination KVM host and cut-over will happen at some point of time to migrate the VM. Note that, when you have shared filesystem on KVM hosts, VM’s disk image will not be copied over network since both KVM hosts have access to same storage pool.


KVM - Live VM Migration
KVM – Live VM Migration


Environment:

  • KVM Hosts – UA-HA & UA-HA2
  • VM Name – UAKVM2


Storage pool:

[root@UA-HA ~]# df -h /kvmpool/
Filesystem                 Size  Used Avail Use% Mounted on
192.168.203.134:/kvmstore  1.8G  1.7G   88M  96% /kvmpool
[root@UA-HA ~]# ssh UA-HA2 df -h /kvmpool/
Filesystem                 Size  Used Avail Use% Mounted on
192.168.203.134:/kvmstore  1.8G  1.7G   88M  96% /kvmpool
[root@UA-HA ~]# ls -lrt /kvmpool
total 1710924
-rw------- 1 root root 4295884800 Dec 22 18:07 UAKVM2.qcow2
[root@UA-HA ~]#


You must have configured “ssh password less root login” between KVM hosts to start the migration immediately to avoid root password prompt.


1.Login to the KVM host where the VM is presently running.

[root@UA-HA ~]# virsh list
 Id    Name                           State
----------------------------------------------------
 10    UAKVM2                         running

[root@UA-HA ~]#


2. Login to the virtual guest and ping some remote IP to check if any packet drops during the Live migration. Do not stop the ping until the migration completes.

[root@UA-KVM1 ~]# uptime
 23:55:25 up 0 min,  1 user,  load average: 0.94, 0.27, 0.09
[root@UA-KVM1 ~]# ping 192.168.203.134
PING 192.168.203.134 (192.168.203.134) 56(84) bytes of data.
64 bytes from 192.168.203.134: icmp_seq=1 ttl=64 time=1.72 ms
64 bytes from 192.168.203.134: icmp_seq=2 ttl=64 time=5.09 ms
64 bytes from 192.168.203.134: icmp_seq=3 ttl=64 time=0.950 ms
64 bytes from 192.168.203.134: icmp_seq=4 ttl=64 time=0.970 ms


3. From the KVM host, initiate the Live migration from UA-HA host to UA-HA2.

[root@UA-HA ~]# virsh migrate UAKVM2 qemu+ssh://root@UA-HA2/system

[root@UA-HA ~]#


4.You will not notice any packet drops or session disconnect during the VM migration. (It like VMware vMotion)

[root@UA-KVM1 ~]# uptime
 23:55:25 up 0 min,  1 user,  load average: 0.94, 0.27, 0.09
[root@UA-KVM1 ~]# ping 192.168.203.134
PING 192.168.203.134 (192.168.203.134) 56(84) bytes of data.
64 bytes from 192.168.203.134: icmp_seq=1 ttl=64 time=1.72 ms
64 bytes from 192.168.203.134: icmp_seq=2 ttl=64 time=5.09 ms
64 bytes from 192.168.203.134: icmp_seq=3 ttl=64 time=0.950 ms
64 bytes from 192.168.203.134: icmp_seq=4 ttl=64 time=0.970 ms
64 bytes from 192.168.203.134: icmp_seq=5 ttl=64 time=0.439 ms
64 bytes from 192.168.203.134: icmp_seq=6 ttl=64 time=2.67 ms   ----------> Migration completed Here.
64 bytes from 192.168.203.134: icmp_seq=7 ttl=64 time=2.22 ms
64 bytes from 192.168.203.134: icmp_seq=8 ttl=64 time=2.50 ms
64 bytes from 192.168.203.134: icmp_seq=9 ttl=64 time=2.86 ms
64 bytes from 192.168.203.134: icmp_seq=10 ttl=64 time=2.22 ms
64 bytes from 192.168.203.134: icmp_seq=11 ttl=64 time=3.10 ms
64 bytes from 192.168.203.134: icmp_seq=12 ttl=64 time=1.84 ms
64 bytes from 192.168.203.134: icmp_seq=13 ttl=64 time=2.05 ms
64 bytes from 192.168.203.134: icmp_seq=14 ttl=64 time=2.37 ms
64 bytes from 192.168.203.134: icmp_seq=15 ttl=64 time=0.893 ms
64 bytes from 192.168.203.134: icmp_seq=16 ttl=64 time=1.85 ms
64 bytes from 192.168.203.134: icmp_seq=17 ttl=64 time=0.593 ms
^C
--- 192.168.203.134 ping statistics ---
17 packets transmitted, 17 received, 0% packet loss, time 16032ms
rtt min/avg/max/mdev = 0.439/2.022/5.098/1.096 ms
[root@UA-KVM1 ~]#


5.Login to the second KVM host and check the VM status.

[root@UA-HA2 ~]# virsh list
 Id    Name                           State
----------------------------------------------------
 3     UAKVM2                         running

[root@UA-HA2 ~]#


You can also connect to the KVM hypervisor from UA-HA like below.

[root@UA-HA ~]# virsh --connect qemu+ssh://root@UA-HA2/system list
 Id    Name                           State
----------------------------------------------------
 3     UAKVM2                         running

[root@UA-HA ~]#


We have successfully migrated KVM guest from UA-HA to UA-HA2.

Hope this article is informative to you . Share it ! Comment it !! Be Sociable !!!

The post Perform Live Migration on Linux KVM – Part 11 appeared first on UnixArena.

Compare Redhat Cluster Releases – RHEL 7 HA vs RHEL 6 HA

$
0
0

In this article ,we will see the difference between Redhat cluster 6.x (Red Hat Enterprise Linux High Availability Add-On Release 6) and Redhat Cluster 7.x releases (Red Hat Enterprise Linux High Availability Add-On Release 7). In RHEL7 onwards “pacemaker” is the default cluster resource manager.  Corosync is open source cluster engine which is responsible to manage the cluster interconnect and maintains the same cluster configuration across all the cluster nodes. All the configuration changes will be replicated to other node using corosync cluster engine. Pacemaker and Corosync are powerful open source technologies that completely replaces the CMAN and RGManager technologies from previous Redhat cluster releases. Pacemaker has completely simplified  the the cluster configuration and administration.

Note: Pacemaker was shipping from REHL 6 onwards but not used widely since ccs /crm was part of it.

Cluster configuration file locations :

Redhat Cluster Releases Configuration files Description
Prior to Redhat Cluster 7 /etc/cluster/cluster.conf Stores all the configuration of cluster
Redhat Cluster 7 (RHEL 7) /etc/corosync/corosync.conf Membership and Quorum configuration
Redhat Cluster 7 (RHEL 7) /var/lib/heartbeat/crm/cib.xml Cluster node and Resource configuration.


Commands:

Configuration Method Prior to Redhat Cluster 7 Redhat Cluster 7 (RHEL 7)
Command Line utiltiy ccs pcs
GUI tool luci PCSD – Pacemaker Web GUI Utility


Services:

Redhat Cluster Releases Services Description
Prior to Redhat Cluster 7 rgmanager Cluster Resource Manager
Prior to Redhat Cluster 7 cman Manages cluster quorum and cluster membership.
Prior to Redhat Cluster 7 ricci To provide access to luci web-Interface.
Redhat Cluster 7 (RHEL 7) pcsd.service Cluster  Resource Manager
Redhat Cluster 7 (RHEL 7) corosync.service Manages cluster quorum and cluster membership.


Cluster user:

User Access Prior to Redhat Cluster 7 Redhat Cluster 7 (RHEL 7)
Cluster user name ricci hacluster


How simple to create a cluster on RHEL 7 ?

Redhat Cluster Releases Cluster Creation Description
Prior to Redhat Cluster 7 ccs -h node1.ua.com –createcluster uacluster Create  cluster on first node  using ccs
Prior to Redhat Cluster 7 ccs -h node1.ua.com –addnode node2.ua.com Add the second node  to the existing cluster
Redhat Cluster 7 (RHEL 7) pcs cluster setup uacluster node1 node2 Create a cluster on both the nodes using pcs


Is there any pain to remove a cluster in RHEL 7 ?  No. It’s very simple.

Redhat Cluster Releases Remove  Cluster Description
Prior to Redhat Cluster 7 rm /etc/cluster/cluster.conf Remove the cluster.conf file on each cluster nodes
Prior to Redhat Cluster 7 service rgmanager stop; service cman stop; service ricci stop; Stop the cluster services on each cluster nodes
Prior to Redhat Cluster 7 chkconfig rgmanager off; chkconfig cman  off; chkconfig ricci off; Disable the cluster services from startup
Redhat Cluster 7 (RHEL 7) pcs cluster destroy Destroy the cluster in one-shot using pacemaker


Hope this article informative to you.  Share it ! Comment it !! Be Sociable !!!

The post Compare Redhat Cluster Releases – RHEL 7 HA vs RHEL 6 HA appeared first on UnixArena.

RHEL 7 – Redhat Cluster with Pacemaker – Overview – Part 2

$
0
0

Pacemaker is robust and powerful opensource resource manager  which is shipping with  Redhat Enterprise Linux 7 as High Availability Add-on . Pacemaker simplified the cluster configuration and cluster management on RHEL 7 which is really good for system administrators. Compare to the prior redhat cluster release, Redhat cluster 7 looks completely different with corosync cluster engine and pacemaker resource manager. In this article , we will see the Redhat cluster core components and it’s responsibility.


Redhat Cluster Core Components:


1.Resource Agents

Resource agents are nothing but a scripts that start, stop and monitor them.


2.Resource Manager 

Pacemaker provides the brain that processes and reacts to events regarding the cluster. These events include nodes joining or leaving the cluster.  Resource events caused by failures, maintenance and scheduled activities and other administrative actions. Pacemaker will compute the ideal state of the cluster and plot a path to achieve it after any of these events. This may include moving resources, stopping nodes and even forcing them offline with remote power switches.


3. Low-level infrastructure:

Corosync provide reliable messaging, membership and quorum information about the cluster.

Redhat Cluster with Pacemaker


Pacemaker:


Pacemaker is responsible to provide maximum availability for your cluster services/resources by detecting and recovering from node and resource-level failures. It uses messaging and membership capabilities provided by  Corosync to keep the resource available on any of the cluster nodes.

  • Detection and recovery of node and service-level failures
  • Storage agnostic, no requirement for shared storage
  • Resource agnostic, anything that can be scripted can be clustered
  • Supports fencing (STONITH ) for ensuring data integrity
  • Supports large (32 node) and small clusters  (2  node)
  • Supports both quorate and resource-driven clusters
  • Supports practically any redundancy configuration
  • Automatically replicated configuration that can be updated from any node
  • Ability to specify cluster-wide service ordering, colocation and anti-colocation
  • Support for advanced service types
    • Clones: for services which need to be active on multiple nodes
    • Multi-state: for services with multiple modes (e.g. master/slave, primary/secondary)
  • Unified, scriptable cluster management tools

Notes from http://clusterlabs.org/.


Pacemaker’s key components:


  • Cluster Information Base (CIB)

It uses XML format file (cib.xml) to represent the cluster configuration and current state of cluster to all the                  nodes. This file be kept in sync across all the nodes and used by PEngine to compute ideal state of the cluster                 and how it should be achieved.


  • Cluster Resource Management daemon (CRMd)

List of instruction will feed to the designated controller (DC).Pacemaker centralizes all cluster  decision                          making by electing one of the CRMd instances to act as a master. If one CRMd instance fails, automatically                     new one will establish.


  • Local Resource Management daemon (LRMd)

LRMd is responsible to hear the instruction from PEngine.


  • Policy Engine (PEngine or PE)

PEngine uses the CIB XML file to determine the cluster state and recalculate the ideal cluster state based on                  the unexpected results.


  • Fencing daemon (STONITHd)

If any node misbehaves , it better to turned off instead of corrupting the data on shared storage. Shoot-The-                 Other-Node-In-The-Head (STONITHd) offers fencing mechanism in RHEL 7.


Pacemaker Internals


Corosync:

Corosync is an opensource  cluster engine which communicates with multiple cluster nodes and updates the cluster information database (cib.xml) frequently . In previous redhat cluster release, “cman” was responsible for cluster interconnect, messaging and membership capabilities. Pacemaker also supports “heartbeat” which is another opensource cluster engine (Not available in RHEL 7).


Types of Redhat Cluster supported with Pacemaker:


  1. Active/Passive cluster for DR setup:

In the following cluster model, we are using pacemaker and DRBD (Remote Replication) for DR solutions. If production site goes down, Redhat cluster will automatically activates the DR site.

Active/Passive  Cluster
Active/Passive Cluster


2. Active/Passive  cluster for Backup solution:

The following digram shows the Active/Passive shared cluster with common Backup node.

Active Passive shared cluster with common Backup node
Active/Passive shared cluster with common Backup node


3. Active/Active Cluster:

If we have a shared storage, every node can potentially be used for failover. Pacemaker can even run multiple copies of services to spread out the workload across multiple nodes.

Active/Active cluster


Hope this article is informative to you. Share it ! Comment it !! Be Sociable !!!

The post RHEL 7 – Redhat Cluster with Pacemaker – Overview – Part 2 appeared first on UnixArena.


RHEL 7 – Installing Redhat Cluster Software (Corosync/pacemaker) – Part 3

$
0
0

In this article, we will see that how to install Redhat cluster software (Pacemaker) on RHEL 7. If you have valid redhat subscription , you can directly configure redhat repository and install the packages. It also available in the RHEL 7 ISO image as an Add-on Package. Unlike previous redhat cluster releases , Redhat cluster 7 installation looks very simple since redhat has moved to pacemaker & corosync. Prior to proceeding with installation, I would request to go through the following articles.


Environment:

  • Operating System: Redhat Enterprise Linux 7.2
  • Repository : Local YUM Repository using RHEL 7.2 DVD ISO image.
  • Type of Cluster : Active / Passive – Two Node cluster
  • Cluster Resource : KVM guest (VirtualDomain)


YUM Repository configuration for OS , HA & Storage:


1. Copy the RHEL 7.2 DVD ISO image to the system or attach as DVD device.

2. Mount the ISO Image /DVD under “/repo”

[root@UA-HA ~]# df -h /repo
Filesystem      Size  Used Avail Use% Mounted on
/dev/sr1        3.8G  3.8G     0 100% /repo
[root@UA-HA ~]#


3.List the DVD contents.

[root@UA-HA ~]# ls -lrt /repo
total 872
-r--r--r--  1 root root  18092 Mar  6  2012 GPL
-r--r--r--  1 root root   8266 Apr  4  2014 EULA
-r--r--r--  1 root root   3211 Oct 23 09:25 RPM-GPG-KEY-redhat-release
-r--r--r--  1 root root   3375 Oct 23 09:25 RPM-GPG-KEY-redhat-beta
-r--r--r--  1 root root    114 Oct 30 10:54 media.repo
-r--r--r--  1 root root   1568 Oct 30 11:03 TRANS.TBL
dr-xr-xr-x  2 root root   4096 Oct 30 11:03 repodata
dr-xr-xr-x 24 root root   6144 Oct 30 11:03 release-notes
dr-xr-xr-x  2 root root 835584 Oct 30 11:03 Packages
dr-xr-xr-x  2 root root   2048 Oct 30 11:03 LiveOS
dr-xr-xr-x  2 root root   2048 Oct 30 11:03 isolinux
dr-xr-xr-x  3 root root   2048 Oct 30 11:03 images
dr-xr-xr-x  3 root root   2048 Oct 30 11:03 EFI
dr-xr-xr-x  4 root root   2048 Oct 30 11:03 addons
[root@UA-HA ~]#

4. Create the yum repository file with name of “ua.repo” and update with following contents. (Except “cat” command line)

[root@UA-HA ~]# cat /etc/yum.repos.d/ua.repo
[repo-update]
gpgcheck=0
enabled=1
baseurl=file:///repo
name=repo-update

[repo-ha]
gpgcheck=0
enabled=1
baseurl=file:///repo/addons/HighAvailability
name=repo-ha

[repo-storage]
gpgcheck=0
enabled=1
baseurl=file:///repo/addons/ResilientStorage
name=repo-storage
[root@UA-HA ~]#


5.List the configured yum repositories.

[root@UA-HA ~]# yum repolist
Loaded plugins: langpacks, product-id, search-disabled-repos, subscription-manager
This system is not registered to Red Hat Subscription Management. You can use subscription-manager to register.
repo id                                                                         repo name                                                                      status
!repo-ha                                                                        repo-ha                                                                           30
!repo-storage                                                                   repo-storage                                                                      37
!repo-update                                                                    repo-update                                                                    4,620
repolist: 4,687
[root@UA-HA ~]#

We have successfully configured the YUM local repository using RHEL 7.2 ISO image.


Installing Cluster Packages on Nodes:


1.Login to the RHEL 7.2 node as root user.


2. Execute the following command to install the cluster packages and it’s dependencies. Corosync will install along with pacemaker.

[root@UA-HA ~]# yum install -y pacemaker pcs psmisc policycoreutils-python
Loaded plugins: langpacks, product-id, search-disabled-repos, subscription-manager
This system is not registered to Red Hat Subscription Management. You can use subscription-manager to register.
Resolving Dependencies
--> Running transaction check
---> Package pacemaker.x86_64 0:1.1.13-10.el7 will be installed
--> Processing Dependency: pacemaker-cli = 1.1.13-10.el7 for package: pacemaker-1.1.13-10.el7.x86_64
--> Processing Dependency: pacemaker-cluster-libs = 1.1.13-10.el7 for package: pacemaker-1.1.13-10.el7.x86_64
--> Processing Dependency: pacemaker-libs = 1.1.13-10.el7 for package: pacemaker-1.1.13-10.el7.x86_64
--> Processing Dependency: corosync for package: pacemaker-1.1.13-10.el7.x86_64
--> Processing Dependency: libcfg.so.6(COROSYNC_CFG_0.82)(64bit) for package: pacemaker-1.1.13-10.el7.x86_64
--> Processing Dependency: libcmap.so.4(COROSYNC_CMAP_1.0)(64bit) for package: pacemaker-1.1.13-10.el7.x86_64
--> Processing Dependency: libcpg.so.4(COROSYNC_CPG_1.0)(64bit) for package: pacemaker-1.1.13-10.el7.x86_64
--> Processing Dependency: libquorum.so.5(COROSYNC_QUORUM_1.0)(64bit) for package: pacemaker-1.1.13-10.el7.x86_64
--> Processing Dependency: resource-agents for package: pacemaker-1.1.13-10.el7.x86_64
--> Processing Dependency: libcfg.so.6()(64bit) for package: pacemaker-1.1.13-10.el7.x86_64
--> Processing Dependency: libcib.so.4()(64bit) for package: pacemaker-1.1.13-10.el7.x86_64
--> Processing Dependency: libcmap.so.4()(64bit) for package: pacemaker-1.1.13-10.el7.x86_64
--> Processing Dependency: libcorosync_common.so.4()(64bit) for package: pacemaker-1.1.13-10.el7.x86_64
--> Processing Dependency: libcpg.so.4()(64bit) for package: pacemaker-1.1.13-10.el7.x86_64
--> Processing Dependency: libcrmcluster.so.4()(64bit) for package: pacemaker-1.1.13-10.el7.x86_64
--> Processing Dependency: libcrmcommon.so.3()(64bit) for package: pacemaker-1.1.13-10.el7.x86_64
--> Processing Dependency: libcrmservice.so.3()(64bit) for package: pacemaker-1.1.13-10.el7.x86_64
--> Processing Dependency: liblrmd.so.1()(64bit) for package: pacemaker-1.1.13-10.el7.x86_64
--> Processing Dependency: libpe_rules.so.2()(64bit) for package: pacemaker-1.1.13-10.el7.x86_64
--> Processing Dependency: libpe_status.so.4()(64bit) for package: pacemaker-1.1.13-10.el7.x86_64
--> Processing Dependency: libpengine.so.4()(64bit) for package: pacemaker-1.1.13-10.el7.x86_64
--> Processing Dependency: libquorum.so.5()(64bit) for package: pacemaker-1.1.13-10.el7.x86_64
--> Processing Dependency: libstonithd.so.2()(64bit) for package: pacemaker-1.1.13-10.el7.x86_64
--> Processing Dependency: libtransitioner.so.2()(64bit) for package: pacemaker-1.1.13-10.el7.x86_64
---> Package pcs.x86_64 0:0.9.143-15.el7 will be installed
---> Package policycoreutils-python.x86_64 0:2.2.5-20.el7 will be installed
---> Package psmisc.x86_64 0:22.20-9.el7 will be installed
--> Running transaction check
---> Package corosync.x86_64 0:2.3.4-7.el7 will be installed
---> Package corosynclib.x86_64 0:2.3.4-7.el7 will be installed
---> Package pacemaker-cli.x86_64 0:1.1.13-10.el7 will be installed
---> Package pacemaker-cluster-libs.x86_64 0:1.1.13-10.el7 will be installed
---> Package pacemaker-libs.x86_64 0:1.1.13-10.el7 will be installed
---> Package resource-agents.x86_64 0:3.9.5-54.el7 will be installed
--> Finished Dependency Resolution

Dependencies Resolved

=============================================================================================
 Package                       Arch          Version                Repository          Size
=============================================================================================
Installing:
 pacemaker                     x86_64        1.1.13-10.el7          repo-ha            462 k
 pcs                           x86_64        0.9.143-15.el7         repo-ha            4.7 M
 policycoreutils-python        x86_64        2.2.5-20.el7           repo-update        435 k
 psmisc                        x86_64        22.20-9.el7            repo-update        140 k
Installing for dependencies:
 corosync                      x86_64        2.3.4-7.el7            repo-ha            210 k
 corosynclib                   x86_64        2.3.4-7.el7            repo-ha            124 k
 pacemaker-cli                 x86_64        1.1.13-10.el7          repo-ha            253 k
 pacemaker-cluster-libs        x86_64        1.1.13-10.el7          repo-ha             92 k
 pacemaker-libs                x86_64        1.1.13-10.el7          repo-ha            519 k
 resource-agents               x86_64        3.9.5-54.el7           repo-ha            339 k

Transaction Summary
============================================================================================
Install  4 Packages (+6 Dependent packages)

Total download size: 7.3 M
Installed size: 19 M
Downloading packages:
--------------------------------------------------------------------------------------------
Total                         19 MB/s | 7.3 MB  00:00:00
Running transaction check
Running transaction test
Transaction test succeeded
Running transaction
  Installing : corosynclib-2.3.4-7.el7.x86_64                  1/10
  Installing : corosync-2.3.4-7.el7.x86_64                     2/10
  Installing : pacemaker-libs-1.1.13-10.el7.x86_64             3/10
  Installing : pacemaker-cli-1.1.13-10.el7.x86_64              4/10
  Installing : psmisc-22.20-9.el7.x86_64                       5/10
  Installing : resource-agents-3.9.5-54.el7.x86_64             6/10
  Installing : pacemaker-cluster-libs-1.1.13-10.el7.x86_64     7/10
  Installing : pacemaker-1.1.13-10.el7.x86_64                  8/10
  Installing : pcs-0.9.143-15.el7.x86_64                       9/10
  Installing : policycoreutils-python-2.2.5-20.el7.x86_64     10/10
  Verifying  : pcs-0.9.143-15.el7.x86_64                       1/10
  Verifying  : corosync-2.3.4-7.el7.x86_64                     2/10
  Verifying  : pacemaker-cli-1.1.13-10.el7.x86_64              3/10
  Verifying  : psmisc-22.20-9.el7.x86_64                       4/10
  Verifying  : resource-agents-3.9.5-54.el7.x86_64             5/10
  Verifying  : pacemaker-cluster-libs-1.1.13-10.el7.x86_64     6/10
  Verifying  : pacemaker-libs-1.1.13-10.el7.x86_64             7/10
  Verifying  : pacemaker-1.1.13-10.el7.x86_64                  8/10
  Verifying  : policycoreutils-python-2.2.5-20.el7.x86_64      9/10
  Verifying  : corosynclib-2.3.4-7.el7.x86_64                 10/10

Installed:
  pacemaker.x86_64 0:1.1.13-10.el7                  pcs.x86_64 0:0.9.143-15.el7        
policycoreutils-python.x86_64 0:2.2.5-20.el7        psmisc.x86_64 0:22.20-9.el7

Dependency Installed:
  corosync.x86_64 0:2.3.4-7.el7          corosynclib.x86_64 0:2.3.4-7.el7       
  pacemaker-cli.x86_64 0:1.1.13-10.el7   pacemaker-cluster-libs.x86_64 0:1.1.13-10.el7
  pacemaker-libs.x86_64 0:1.1.13-10.el7  resource-agents.x86_64 0:3.9.5-54.el7

Complete!
[root@UA-HA ~]#


We have successfully installed the cluster packages.


Note: crmsh is not available in RHEL 7 which is alternative to pcs commands.


In My cluster environment, I have disabled the firewall & selinux to avoid the complexity .

[root@UA-HA ~]# setenforce 0
setenforce: SELinux is disabled
[root@UA-HA ~]#
[root@UA-HA ~]# cat /etc/selinux/config |grep SELINUX |grep -v "#"
SELINUX=disabled
SELINUXTYPE=targeted
[root@UA-HA ~]#
[root@UA-HA ~]# systemctl stop firewalld.service
[root@UA-HA ~]# systemctl disable firewalld.service
[root@UA-HA ~]# iptables --flush
[root@UA-HA ~]# 


Hope this article is informative to you. In the next article, we will see that how to configure the cluster using pacemaker.

Share it ! Comment it !! Be Sociable !!!

The post RHEL 7 – Installing Redhat Cluster Software (Corosync/pacemaker) – Part 3 appeared first on UnixArena.

RHEL 7 – Configuring Pacemaker/Corosync – Redhat Cluster – Part 4

$
0
0

In this article, we will see that how to configure two node Redhat cluster using pacemaker & corosync on REHL 7.2. Once you have installed the necessary packages, you need to enable the cluster services at the system start-up. You must start the necessary cluster services before kicking off the cluster configuration. “hacluster” user will be created automatically during the package installation with disabled password. Corosync will use this user to sync the cluster configuration,  starting and stopping the cluster on cluster nodes.


Environment:

  • Operating System: Redhat Enterprise Linux 7.2
  • Type of Cluster :  Two Node cluster – Failover
  • Nodes: UA-HA & UA-HA2  (Assuming that packages have been installed on both the nodes)
  • Cluster Resource : KVM guest (VirtualDomain)  –  See in Next Article.


Hardware configuration: 

  1. CPU – 2
  2. Memory – 4GB
  3. NFS – For shared storage


Redhat Cluster 7 - RHEL 7 - PCS
Redhat Cluster 7 – RHEL 7 – PCS


Enable & Start  the Services on both the Nodes:


1.Login to both the cluster nodes as root user.

2. Enable the pcsd daemon on both the nodes to start automatically across the reboot. pcsd is pacemaker configuration daemon. (Not a cluster service)

[root@UA-HA ~]# systemctl start pcsd.service
[root@UA-HA ~]# systemctl enable pcsd.service
Created symlink from /etc/systemd/system/multi-user.target.wants/pcsd.service to /usr/lib/systemd/system/pcsd.service.
[root@UA-HA ~]# systemctl status pcsd.service
● pcsd.service - PCS GUI and remote configuration interface
   Loaded: loaded (/usr/lib/systemd/system/pcsd.service; enabled; vendor preset: disabled)
   Active: active (running) since Sun 2015-12-27 23:22:08 EST; 14s ago
 Main PID: 18411 (pcsd)
   CGroup: /system.slice/pcsd.service
           ├─18411 /bin/sh /usr/lib/pcsd/pcsd start
           ├─18415 /bin/bash -c ulimit -S -c 0 >/dev/null 2>&1 ; /usr/bin/ruby -I/usr/lib/pcsd /usr/lib/pcsd/ssl.rb
           └─18416 /usr/bin/ruby -I/usr/lib/pcsd /usr/lib/pcsd/ssl.rb

Dec 27 23:22:07 UA-HA systemd[1]: Starting PCS GUI and remote configuration interface...
Dec 27 23:22:08 UA-HA systemd[1]: Started PCS GUI and remote configuration interface.
[root@UA-HA ~]#


3. Set the new password for cluster user “hacluster” on both the nodes.

[root@UA-HA ~]# passwd hacluster
Changing password for user hacluster.
New password:
Retype new password:
passwd: all authentication tokens updated successfully.
[root@UA-HA ~]#
[root@UA-HA2 ~]# passwd hacluster
Changing password for user hacluster.
New password:
Retype new password:
passwd: all authentication tokens updated successfully.
[root@UA-HA2 ~]#


Configure corosync & Create new cluster:


1. Login to any of the cluster node and authenticate “hacluster” user.

[root@UA-HA ~]# pcs cluster auth UA-HA UA-HA2
Username: hacluster
Password:
UA-HA: Authorized
UA-HA2: Authorized
[root@UA-HA ~]#


2.Create a new cluster using pcs command.

[root@UA-HA ~]# pcs cluster setup --name UABLR UA-HA UA-HA2
Shutting down pacemaker/corosync services...
Redirecting to /bin/systemctl stop  pacemaker.service
Redirecting to /bin/systemctl stop  corosync.service
Killing any remaining services...
Removing all cluster configuration files...
UA-HA: Succeeded
UA-HA2: Succeeded
Synchronizing pcsd certificates on nodes UA-HA, UA-HA2...
UA-HA: Success
UA-HA2: Success

Restaring pcsd on the nodes in order to reload the certificates...
UA-HA: Success
UA-HA2: Success
[root@UA-HA ~]#


3. Check the cluster status .

[root@UA-HA ~]# pcs status
Error: cluster is not currently running on this node
[root@UA-HA ~]#

You see the error because , cluster service is not started.


4. Start the cluster using pcs command. “–all” will start the cluster on all the configured nodes.

[root@UA-HA ~]# pcs cluster start --all
UA-HA2: Starting Cluster...
UA-HA: Starting Cluster...
[root@UA-HA ~]#


In the back-end , “pcs cluster start” command will trigger the following command on each cluster node.

# systemctl start corosync.service
# systemctl start pacemaker.service


5. Check the cluster services status.

[root@UA-HA ~]# systemctl status corosync
● corosync.service - Corosync Cluster Engine
   Loaded: loaded (/usr/lib/systemd/system/corosync.service; disabled; vendor preset: disabled)
   Active: active (running) since Sun 2015-12-27 23:34:31 EST; 11s ago
  Process: 18994 ExecStart=/usr/share/corosync/corosync start (code=exited, status=0/SUCCESS)
 Main PID: 19001 (corosync)
   CGroup: /system.slice/corosync.service
           └─19001 corosync

Dec 27 23:34:31 UA-HA corosync[19001]:  [VOTEQ ] Waiting for all cluster members. Current votes: 1 expected_votes: 2
Dec 27 23:34:31 UA-HA corosync[19001]:  [QUORUM] Members[1]: 1
Dec 27 23:34:31 UA-HA corosync[19001]:  [MAIN  ] Completed service synchronization, ready to provide service.
Dec 27 23:34:31 UA-HA corosync[19001]:  [TOTEM ] A new membership (192.168.203.131:1464) was formed. Members joined: 2
Dec 27 23:34:31 UA-HA corosync[19001]:  [QUORUM] This node is within the primary component and will provide service.
Dec 27 23:34:31 UA-HA corosync[19001]:  [QUORUM] Members[2]: 2 1
Dec 27 23:34:31 UA-HA corosync[19001]:  [MAIN  ] Completed service synchronization, ready to provide service.
Dec 27 23:34:31 UA-HA systemd[1]: Started Corosync Cluster Engine.
Dec 27 23:34:31 UA-HA corosync[18994]: Starting Corosync Cluster Engine (corosync): [  OK  ]
[root@UA-HA ~]# systemctl status pacemaker
● pacemaker.service - Pacemaker High Availability Cluster Manager
   Loaded: loaded (/usr/lib/systemd/system/pacemaker.service; disabled; vendor preset: disabled)
   Active: active (running) since Sun 2015-12-27 23:34:32 EST; 15s ago
 Main PID: 19016 (pacemakerd)
   CGroup: /system.slice/pacemaker.service
           ├─19016 /usr/sbin/pacemakerd -f
           ├─19017 /usr/libexec/pacemaker/cib
           ├─19018 /usr/libexec/pacemaker/stonithd
           ├─19019 /usr/libexec/pacemaker/lrmd
           ├─19020 /usr/libexec/pacemaker/attrd
           ├─19021 /usr/libexec/pacemaker/pengine
           └─19022 /usr/libexec/pacemaker/crmd

Dec 27 23:34:33 UA-HA crmd[19022]:   notice: pcmk_quorum_notification: Node UA-HA2[2] - state is now member (was (null))
Dec 27 23:34:33 UA-HA crmd[19022]:   notice: pcmk_quorum_notification: Node UA-HA[1] - state is now member (was (null))
Dec 27 23:34:33 UA-HA stonith-ng[19018]:   notice: Watching for stonith topology changes
Dec 27 23:34:33 UA-HA crmd[19022]:   notice: Notifications disabled
Dec 27 23:34:33 UA-HA crmd[19022]:   notice: The local CRM is operational
Dec 27 23:34:33 UA-HA crmd[19022]:   notice: State transition S_STARTING -> S_PENDING [ input=I_PENDING cause=C_FSA_INTERNAL origin=do_started ]
Dec 27 23:34:33 UA-HA attrd[19020]:  warning: Node names with capitals are discouraged, consider changing 'UA-HA2' to something else
Dec 27 23:34:33 UA-HA attrd[19020]:   notice: crm_update_peer_proc: Node UA-HA2[2] - state is now member (was (null))
Dec 27 23:34:33 UA-HA stonith-ng[19018]:  warning: Node names with capitals are discouraged, consider changing 'UA-HA2' to something else
Dec 27 23:34:34 UA-HA stonith-ng[19018]:   notice: crm_update_peer_proc: Node UA-HA2[2] - state is now member (was (null))
[root@UA-HA ~]#


Verify Corosync configuration:


1. Check the corosync communication status.

[root@UA-HA ~]# corosync-cfgtool -s
Printing ring status.
Local node ID 1
RING ID 0
        id      = 192.168.203.134
        status  = ring 0 active with no faults
[root@UA-HA ~]#


In my setup, first RING is using interface “br0”.

[root@UA-HA ~]# ifconfig br0
br0: flags=4163<UP,BROADCAST,RUNNING,MULTICAST>  mtu 1500
        inet 192.168.203.134  netmask 255.255.255.0  broadcast 192.168.203.255
        inet6 fe80::84ef:2eff:fee9:260a  prefixlen 64  scopeid 0x20
        ether 00:0c:29:2d:3f:ce  txqueuelen 0  (Ethernet)
        RX packets 15797  bytes 1877460 (1.7 MiB)
        RX errors 0  dropped 0  overruns 0  frame 0
        TX packets 7018  bytes 847881 (828.0 KiB)
        TX errors 0  dropped 0 overruns 0  carrier 0  collisions 0

[root@UA-HA ~]#

We can have multiple RINGS to provide the redundancy for the cluster communication. (We use to call LLT links in VCS )


2. Check the membership and quorum API’s.

[root@UA-HA ~]# corosync-cmapctl  | grep members
runtime.totem.pg.mrp.srp.members.1.config_version (u64) = 0
runtime.totem.pg.mrp.srp.members.1.ip (str) = r(0) ip(192.168.203.134)
runtime.totem.pg.mrp.srp.members.1.join_count (u32) = 1
runtime.totem.pg.mrp.srp.members.1.status (str) = joined
runtime.totem.pg.mrp.srp.members.2.config_version (u64) = 0
runtime.totem.pg.mrp.srp.members.2.ip (str) = r(0) ip(192.168.203.131)
runtime.totem.pg.mrp.srp.members.2.join_count (u32) = 1
runtime.totem.pg.mrp.srp.members.2.status (str) = joined
[root@UA-HA ~]#
[root@UA-HA ~]# pcs status corosync

Membership information
----------------------
    Nodeid      Votes Name
         2          1 UA-HA2
         1          1 UA-HA (local)
[root@UA-HA ~]#


Verify Pacemaker Configuration:


1. Check the running pacemaker processes.

[root@UA-HA ~]# ps axf |grep pacemaker
19324 pts/0    S+     0:00  |       \_ grep --color=auto pacemaker
19016 ?        Ss     0:00 /usr/sbin/pacemakerd -f
19017 ?        Ss     0:00  \_ /usr/libexec/pacemaker/cib
19018 ?        Ss     0:00  \_ /usr/libexec/pacemaker/stonithd
19019 ?        Ss     0:00  \_ /usr/libexec/pacemaker/lrmd
19020 ?        Ss     0:00  \_ /usr/libexec/pacemaker/attrd
19021 ?        Ss     0:00  \_ /usr/libexec/pacemaker/pengine
19022 ?        Ss     0:00  \_ /usr/libexec/pacemaker/crmd


2. Check the cluster status.

[root@UA-HA ~]# pcs status
Cluster name: UABLR
WARNING: no stonith devices and stonith-enabled is not false
Last updated: Sun Dec 27 23:44:44 2015          Last change: Sun Dec 27 23:34:55 2015 by hacluster via crmd on UA-HA
Stack: corosync
Current DC: UA-HA (version 1.1.13-10.el7-44eb2dd) - partition with quorum
2 nodes and 0 resources configured

Online: [ UA-HA UA-HA2 ]

Full list of resources:


PCSD Status:
  UA-HA: Online
  UA-HA2: Online

Daemon Status:
  corosync: active/disabled
  pacemaker: active/disabled
  pcsd: active/enabled
[root@UA-HA ~]#


3. You can see that corosync & pacemaker is active now and disabled across the system reboot. If you would like to start the cluster automatically across the reboot, you can enable it using systemctl command.

[root@UA-HA2 ~]# systemctl enable corosync
Created symlink from /etc/systemd/system/multi-user.target.wants/corosync.service to /usr/lib/systemd/system/corosync.service.
[root@UA-HA2 ~]# systemctl enable pacemaker
Created symlink from /etc/systemd/system/multi-user.target.wants/pacemaker.service to /usr/lib/systemd/system/pacemaker.service.
[root@UA-HA2 ~]# pcs status
Cluster name: UABLR
WARNING: no stonith devices and stonith-enabled is not false
Last updated: Sun Dec 27 23:51:30 2015          Last change: Sun Dec 27 23:34:55 2015 by hacluster via crmd on UA-HA
Stack: corosync
Current DC: UA-HA (version 1.1.13-10.el7-44eb2dd) - partition with quorum
2 nodes and 0 resources configured

Online: [ UA-HA UA-HA2 ]

Full list of resources:


PCSD Status:
  UA-HA: Online
  UA-HA2: Online

Daemon Status:
  corosync: active/enabled
  pacemaker: active/enabled
  pcsd: active/enabled
[root@UA-HA2 ~]#


4. When the cluster starts, it automatically records the number and details of the nodes in the cluster, as well as which stack is being used and the version of Pacemaker being used. To view the cluster configuration (Cluster Information Base – CIB) in XML format, use the following command.

[root@UA-HA2 ~]# pcs cluster cib


5. Verify the cluster information base using the following command.

[root@UA-HA ~]# crm_verify -L -V
   error: unpack_resources:     Resource start-up disabled since no STONITH resources have been defined
   error: unpack_resources:     Either configure some or disable STONITH with the stonith-enabled option
   error: unpack_resources:     NOTE: Clusters with shared data need STONITH to ensure data integrity
Errors found during check: config not valid
[root@UA-HA ~]#

By default pacemaker enables STONITH (Shoot The Other Node In The Head ) / Fencing in an order to protect the data. Fencing is mandatory when you use the shared storage to avoid the data corruptions.

For time being , we will disable the STONITH and configure it later.


6. Disable the STONITH (Fencing)

[root@UA-HA ~]#pcs property set stonith-enabled=false
[root@UA-HA ~]# 
[root@UA-HA ~]#  pcs property show stonith-enabled
Cluster Properties:
 stonith-enabled: false
[root@UA-HA ~]#


7. Verify the cluster configuration again. Hope the errors will be disappear

[root@UA-HA ~]# crm_verify -L -V
[root@UA-HA ~]#


We have successfully configured two node redhat cluster  on RHEL 7.2 with new components pacemaker and corosync.  Hope this article is informative to you.

Share it ! Comment it !! Be Sociable !!!


The post RHEL 7 – Configuring Pacemaker/Corosync – Redhat Cluster – Part 4 appeared first on UnixArena.

RHEL 7 – Pacemaker – Cluster Resource Agents Overview – Part 5

$
0
0

Resource agents plays an important role in cluster management.  Resource agents are multi-threaded processes that provides the logic to manage  the resources. Pacemaker has one agent per resource type. Resource type could be a File-system , IP address , databases, virtual-domain and more. Resource agent is responsible to monitor, start , stop,validate , migrate , promote and demote  the cluster resources whenever required. Most of the resource agents are compliant  to Open Cluster Framework (OCF) .  Let’s add one IP resource to the existing cluster and then we will get in to the detailed explanation of command options. 


1. Login to one of the Redhat Cluster (Pacemaker/corosync) cluster node as root user.


2. Check the cluster status .

[root@UA-HA ~]# pcs status
Cluster name: UABLR
Last updated: Mon Dec 28 13:06:01 2015          Last change: Sun Dec 27 23:59:59 2015 by root via cibadmin on UA-HA
Stack: corosync
Current DC: UA-HA (version 1.1.13-10.el7-44eb2dd) - partition with quorum
2 nodes and 0 resources configured

Online: [ UA-HA UA-HA2 ]

Full list of resources:


PCSD Status:
  UA-HA: Online
  UA-HA2: Online

Daemon Status:
  corosync: active/enabled
  pacemaker: active/enabled
  pcsd: active/enabled
[root@UA-HA ~]#


3. Add the IP which needs to be high-available (Clustered IP).

[root@UA-HA ~]# pcs resource create ClusterIP ocf:heartbeat:IPaddr2 ip=192.168.203.190 cidr_netmask=24 op monitor interval=30s
[root@UA-HA ~]#

ClusterIP – Resource Name(You can give any name)
ocf:heartbeat:IPaddr2 – Resource agent Name.


Resource Standard:

The first field (ocf in this case) is the standard to which the resource script conforms and where to find it.
To obtain a list of the available resource standards , use the following command.

[root@UA-HA ~]# pcs resource standards
ocf   - Open cluster Framework 
lsb   - Linux standard base (legacy init scripts)
service - Based on Linux "service" command. 
systemd  - systemd based service Management
stonith  - Fencing Resource standard. 
[root@UA-HA ~]#


Resource Provides:

The second field (heartbeat in this case) is standard-specific; for OCF resources, it tells the cluster which OCF namespace the resource script is in. To obtain a list of the available OCF resource providers, use the following command.

[root@UA-HA ~]# pcs resource providers
heartbeat
openstack
pacemaker
[root@UA-HA ~]#


What are the pre-built resource agents available in RHEL 7.2  ? 

The third field (IPaddr2 in this case) is the name of the resource script. To see all the resource agents available for a specific OCF provider (heartbeat) , use the following command.

[root@UA-HA ~]# pcs resource agents ocf:heartbeat
CTDB
Delay
Dummy
Filesystem
IPaddr
IPaddr2
IPsrcaddr
LVM
MailTo
Route
SendArp
Squid
VirtualDomain
Xinetd
apache
clvm
conntrackd
db2
dhcpd
docker
ethmonitor
exportfs
galera
iSCSILogicalUnit
iSCSITarget
iface-vlan
mysql
named
nfsnotify
nfsserver
nginx
oracle
oralsnr
pgsql
postfix
rabbitmq-cluster
redis
rsyncd
slapd
symlink
tomcat
[root@UA-HA ~]# pcs resource agents ocf:heartbeat |wc -l
41
[root@UA-HA ~]#


For Openstack , you have following resources agents.

[root@UA-HA ~]# pcs resource agents ocf:openstack
NovaCompute
NovaEvacuate
[root@UA-HA ~]#


Here is the list resource agents to manager the pacemaker components.

[root@UA-HA ~]# pcs resource agents ocf:pacemaker
ClusterMon
Dummy
HealthCPU
HealthSMART
Stateful
SysInfo
SystemHealth
controld
ping
pingd
remote
[root@UA-HA ~]#


4.Verify the resource status.

[root@UA-HA ~]# pcs status
Cluster name: UABLR
Last updated: Mon Dec 28 13:07:33 2015          Last change: Mon Dec 28 13:07:30 2015 by root via cibadmin on UA-HA
Stack: corosync
Current DC: UA-HA (version 1.1.13-10.el7-44eb2dd) - partition with quorum
2 nodes and 1 resource configured

Online: [ UA-HA UA-HA2 ]

Full list of resources:

 ClusterIP      (ocf::heartbeat:IPaddr2):       Started UA-HA

PCSD Status:
  UA-HA: Online
  UA-HA2: Online

Daemon Status:
  corosync: active/enabled
  pacemaker: active/enabled
  pcsd: active/enabled


As per the cluster status , IP resource is online on node “UA-HA” . Let’s verify from OS command line.

[root@UA-HA ~]# ip a |grep inet
    inet 127.0.0.1/8 scope host lo
    inet6 ::1/128 scope host
    inet 192.168.203.134/24 brd 192.168.203.255 scope global dynamic br0
    inet 192.168.203.190/24 brd 192.168.203.255 scope global secondary br0
    inet6 fe80::84ef:2eff:fee9:260a/64 scope link
    inet 192.168.122.1/24 brd 192.168.122.255 scope global virbr0
[root@UA-HA ~]#
[root@UA-HA ~]# ping 192.168.203.190
PING 192.168.203.190 (192.168.203.190) 56(84) bytes of data.
64 bytes from 192.168.203.190: icmp_seq=1 ttl=64 time=0.084 ms
64 bytes from 192.168.203.190: icmp_seq=2 ttl=64 time=0.090 ms
64 bytes from 192.168.203.190: icmp_seq=3 ttl=64 time=0.121 ms
64 bytes from 192.168.203.190: icmp_seq=4 ttl=64 time=0.094 ms
^C
--- 192.168.203.190 ping statistics ---
4 packets transmitted, 4 received, 0% packet loss, time 3006ms
rtt min/avg/max/mdev = 0.084/0.097/0.121/0.015 ms
[root@UA-HA ~]#


We can see that IP “192.168.203.190/24” is up & running. This IP will  automatically move from one node to another node if the system fails.

The post RHEL 7 – Pacemaker – Cluster Resource Agents Overview – Part 5 appeared first on UnixArena.

RHEL 7 – Pacemaker – Cluster Resources/Group Management – Part 6

$
0
0

In Pacemaker/Corosync  cluster (RHEL 7 HA),  resources management and resource group management are important tasks . Depends on the cluster HA services, you might need to configure N-number of resources. In most of the cases , you might need to start set of resources sequentially, and stop in the reverse order.  To simplify this configuration, Pacemaker supports the concept of groups (Resource groups). For an example, to provide the web-services in HA model, you need resources like , File system(To store website data) , IP (Clustered IP to access website) and Apache (To provide the web-services) . To start the Apache service , you need a filesystem which stores the website data. So the resources must start in the following order ,

  1. IP
  2. File-system
  3. Apache service


Let’s see that how to configure the Highly available Apache service (website) in Redhat cluster (Pacemaker/Corosync).  In the previous article, we have already created the IP resource.

[root@UA-HA ~]# pcs status
Cluster name: UABLR
Last updated: Mon Dec 28 18:24:10 2015          Last change: Mon Dec 28 18:09:30 2015 by root via crm_resource on UA-HA
Stack: corosync
Current DC: UA-HA2 (version 1.1.13-10.el7-44eb2dd) - partition with quorum
2 nodes and 1 resource configured

Online: [ UA-HA UA-HA2 ]

Full list of resources:

ClusterIP  (ocf::heartbeat:IPaddr2):       Started UA-HA

PCSD Status:
  UA-HA: Online
  UA-HA2: Online

Daemon Status:
  corosync: active/enabled
  pacemaker: active/enabled
  pcsd: active/enabled
[root@UA-HA ~]# pcs resource show ClusterIP
 Resource: ClusterIP (class=ocf provider=heartbeat type=IPaddr2)
  Attributes: ip=192.168.203.190 cidr_netmask=24
  Operations: start interval=0s timeout=20s (ClusterIP-start-interval-0s)
              stop interval=0s timeout=20s (ClusterIP-stop-interval-0s)
              monitor interval=30s (ClusterIP-monitor-interval-30s)
[root@UA-HA ~]#


Create the File-system and  Apache resources quickly:


Filesystem : 

  • Shared LUN – /dev/sdc
  • Volume Group – webvg
  • Volume – webvol1
  • Filesystem Type – ext4


Quick Setup for Filesystem resource: 

[root@UA-HA2 ~]# vgcreate webvg /dev/sdc
[root@UA-HA2 ~]# lvcreate -L 90M -n /dev/webvg/webvol1
[root@UA-HA2 ~]# mkfs.ext4 /dev/webvg/webvol1


Apache:

  • httpd

Quick Setup:

[root@UA-HA www]# yum install -y httpd


Pre-prerequisites for LVM :

(Perform the following changes on both the cluster nodes)

1.Make sure that “use_lvmetad” parameter is set to “0”. This is mandatory when you use “Pacemaker”.

[root@UA-HA ~]# grep use_lvmetad /etc/lvm/lvm.conf |grep -v "#"
    use_lvmetad = 0
[root@UA-HA ~]#


2.To prevent the automatic volume group activation, update the volume_list parameter with local VG’s which needs to be activated automatically.

[root@UA-HA ~]# grep volume_list /etc/lvm/lvm.conf |grep -v "#"
        volume_list = [ "nfsvg", "rhel" ]
[root@UA-HA ~]# vgs
  VG    #PV #LV #SN Attr   VSize  VFree
  nfsvg   2   1   0 wz--n-  1.94g 184.00m
  rhel    1   2   0 wz--n- 19.51g      0
  webvg   1   1   0 wz--n- 92.00m      0
[root@UA-HA ~]#

In My case, “webvg” will be managed through cluster.


3. Mount the volume in “/var/www”  and create the following directories and files.

[root@UA-HA2 ~]# mount /dev/webvg/webvol1 /var/www
[root@UA-HA2 ~]# cd /var/www
[root@UA-HA2 www]# mkdir errror html cgi-bin
total 3
drwxr-xr-x 2 root root 1024 Dec 28 20:26 cgi-bin
drwxr-xr-x 2 root root 1024 Dec 28 20:26 errror
drwxr-xr-x 2 root root 1024 Dec 28 20:27 html
[root@UA-HA2 www]# cd html/
[root@UA-HA2 html]# vi index.html
Hello, Welcome to UnixArena 

[root@UA-HA2 html]#


3.Rebuild the “initramfs” boot image to guarantee that the boot image will not try to activate a volume group controlled by the cluster. Update the initramfs device using the following command.

[root@UA-HA ~]# dracut -H -f /boot/initramfs-$(uname -r).img $(uname -r)
[root@UA-HA ~]#


4. Reboot the nodes.


Create the LVM Cluster resources (vg & lv ), File-system cluster Resources:


1.Create the cluster volume group resource.

[root@UA-HA ~]# pcs resource create vgres LVM volgrpname=webvg exclusive=true
[root@UA-HA ~]# pcs resource show vgres
 Resource: vgres (class=ocf provider=heartbeat type=LVM)
  Attributes: volgrpname=webvg exclusive=true
  Operations: start interval=0s timeout=30 (vgres-start-interval-0s)
              stop interval=0s timeout=30 (vgres-stop-interval-0s)
              monitor interval=10 timeout=30 (vgres-monitor-interval-10)
[root@UA-HA ~]#

vgresResource Name (Any Unique Name)
webvgVolume Group


2. Create the cluster mount resource.

[root@UA-HA ~]# pcs resource create webvolfs Filesystem  device="/dev/webvg/webvol1" directory="/var/www" fstype="ext4"
[root@UA-HA ~]# pcs resource show webvolfs
 Resource: webvolfs (class=ocf provider=heartbeat type=Filesystem)
  Attributes: device=/dev/webvg/webvol1 directory=/var/www fstype=ext4
  Meta Attrs: 
  Operations: start interval=0s timeout=60 (webvolfs-start-interval-0s)
              stop interval=0s timeout=60 (webvolfs-stop-interval-0s)
              monitor interval=20 timeout=40 (webvolfs-monitor-interval-20)
[root@UA-HA ~]#


3. Before adding the resource, you must update the local /etc/httpd/conf/httpd.conf with following contents. This entries required for pacemaker to get the web-server status .

Update apache conf
Update apache conf


4. Check the apache server status . (httpd.service). Make sure that httpd.service is stopped & disabled on both the cluster nodes. This service will be managed by cluster.

[root@UA-HA ~]# systemctl status httpd.service
● httpd.service - The Apache HTTP Server
   Loaded: loaded (/usr/lib/systemd/system/httpd.service; disabled; vendor preset: disabled)
   Active: inactive (dead)
     Docs: man:httpd(8)
           man:apachectl(8)

Dec 27 13:55:52 UA-HA systemd[1]: Starting The Apache HTTP Server...
Dec 27 13:55:55 UA-HA httpd[2002]: AH00558: httpd: Could not reliably determine the server's fully qualified domain name, using 192.168.203.134. Set the...is message
Dec 27 13:55:55 UA-HA systemd[1]: Started The Apache HTTP Server.
Dec 27 15:16:02 UA-HA httpd[11786]: AH00558: httpd: Could not reliably determine the server's fully qualified domain name, using 192.168.203.134. Set th...is message
Dec 27 15:16:02 UA-HA systemd[1]: Reloaded The Apache HTTP Server.
Dec 28 18:06:57 UA-HA systemd[1]: Started The Apache HTTP Server.
Dec 28 20:30:56 UA-HA systemd[1]: Stopping The Apache HTTP Server...
Dec 28 20:30:57 UA-HA systemd[1]: Stopped The Apache HTTP Server.
Hint: Some lines were ellipsized, use -l to show in full.
[root@UA-HA ~]#


3. Create the Apache cluster resource.

[root@UA-HA ~]# pcs resource create webres apache configfile="/etc/httpd/conf/httpd.conf" statusurl="http://127.0.0.1/server-status"
[root@UA-HA ~]# pcs status
Cluster name: UABLR
Last updated: Mon Dec 28 20:11:51 2015          Last change: Mon Dec 28 20:11:44 2015 by root via cibadmin on UA-HA
Stack: corosync
Current DC: UA-HA2 (version 1.1.13-10.el7-44eb2dd) - partition with quorum
2 nodes and 4 resources configured

Online: [ UA-HA UA-HA2 ]

Full list of resources:

 vgres  (ocf::heartbeat:LVM):   (target-role:Stopped) Stopped
 webvolfs       (ocf::heartbeat:Filesystem):    (target-role:Stopped) Stopped
 ClusterIP      (ocf::heartbeat:IPaddr2):       Started UA-HA2
 webres (ocf::heartbeat:apache):        Stopped

PCSD Status:
  UA-HA: Online
  UA-HA2: Online

Daemon Status:
  corosync: active/enabled
  pacemaker: active/enabled
  pcsd: active/enabled
[root@UA-HA ~]#


In normal cases, resource group will be created (by specifying –group in the end of command line) when you add the first cluster resource to make the dependency tree. To understand the cluster resources and resource group management concept , I am creating the resource group at the end.


If you see any resource was started , just stop it to avoid the errors.

[root@UA-HA ~]# pcs resource disable vgres webvolfs webres stop ClusterIP      
[root@UA-HA ~]# pcs resource
 vgres  (ocf::heartbeat:LVM):                    Stopped
 webvolfs       (ocf::heartbeat:Filesystem):     Stopped
 ClusterIP      (ocf::heartbeat:IPaddr2):        Stopped
 webres (ocf::heartbeat:apache):                 Stopped
[root@UA-HA ~]#


4. Create the resource group to form the resource dependencies to stop & start in resources in sequence.

[root@UA-HA ~]# pcs resource group add WEBRG1 ClusterIP vgres webvolfs webres


As per the above command , here is the resource start up sequence

  1. ClusterIP – Website URL
  2. vgres – Volume Group
  3. webvolfs – Mount Resource
  4. webres – httpd Resource


Stop sequence is just reverse to the start.

  1. webres – httpd Resource
  2. webvolfs – Mount Resource
  3. vgres – Volume Group
  4. ClusterIP – Website URL


5. Check the resources status. You should be able to see that all the resources are bundled as one resource group with  “WEBRG1” .

[root@UA-HA ~]# pcs resource
 Resource Group: WEBRG1
     ClusterIP  (ocf::heartbeat:IPaddr2):       Started UA-HA2
     vgres      (ocf::heartbeat:LVM):            Stopped
     webvolfs   (ocf::heartbeat:Filesystem):     Stopped
     webres     (ocf::heartbeat:apache):         Stopped
[root@UA-HA ~]#


6. Enable the disabled resources in following sequence.

[root@UA-HA ~]# pcs resource enable ClusterIP
[root@UA-HA ~]# pcs resource enable vgres
[root@UA-HA ~]# pcs resource enable webvolfs
[root@UA-HA ~]# pcs resource enable webres


7. Verify the cluster status.

[root@UA-HA ~]# pcs status
Cluster name: UABLR
Last updated: Mon Dec 28 20:54:43 2015          Last change: Mon Dec 28 20:51:30 2015 by root via crm_resource on UA-HA2
Stack: corosync
Current DC: UA-HA2 (version 1.1.13-10.el7-44eb2dd) - partition with quorum
2 nodes and 4 resources configured

Online: [ UA-HA UA-HA2 ]

Full list of resources:

 Resource Group: WEBRG1
     ClusterIP  (ocf::heartbeat:IPaddr2):       Started UA-HA2
     vgres      (ocf::heartbeat:LVM):   Started UA-HA2
     webvolfs   (ocf::heartbeat:Filesystem):    Started UA-HA2
     webres     (ocf::heartbeat:apache):        Started UA-HA2

PCSD Status:
  UA-HA: Online
  UA-HA2: Online

Daemon Status:
  corosync: active/enabled
  pacemaker: active/enabled
  pcsd: active/enabled
[root@UA-HA ~]#


8. Let’s move the resources from UA-HA2 to UA-HA. In this case, we no need to move each resources manually.We just need to move the Resource group since we have bundled the required resource in to that.

[root@UA-HA ~]# pcs resource move WEBRG1 UA-HA
[root@UA-HA ~]# pcs status
Cluster name: UABLR
Last updated: Mon Dec 28 20:58:55 2015          Last change: Mon Dec 28 20:58:41 2015 by root via crm_resource on UA-HA
Stack: corosync
Current DC: UA-HA2 (version 1.1.13-10.el7-44eb2dd) - partition with quorum
2 nodes and 4 resources configured

Online: [ UA-HA UA-HA2 ]

Full list of resources:

 Resource Group: WEBRG1
     ClusterIP  (ocf::heartbeat:IPaddr2):       Started UA-HA
     vgres      (ocf::heartbeat:LVM):   Started UA-HA
     webvolfs   (ocf::heartbeat:Filesystem):    Started UA-HA
     webres     (ocf::heartbeat:apache):        Started UA-HA

PCSD Status:
  UA-HA: Online
  UA-HA2: Online

Daemon Status:
  corosync: active/enabled
  pacemaker: active/enabled
  pcsd: active/enabled
[root@UA-HA ~]#


You should be able to see the webpage like following .

Website Portal
Website Portal


9. How to stop the pacemaker resource group ? Just disable the resource group.

[root@UA-HA2 ~]# pcs resource disable WEBRG1
[root@UA-HA2 ~]# pcs status
Cluster name: UABLR
Last updated: Mon Dec 28 21:12:18 2015          Last change: Mon Dec 28 21:12:14 2015 by root via crm_resource on UA-HA2
Stack: corosync
Current DC: UA-HA2 (version 1.1.13-10.el7-44eb2dd) - partition with quorum
2 nodes and 4 resources configured

Online: [ UA-HA UA-HA2 ]

Full list of resources:

 Resource Group: WEBRG1
     ClusterIP  (ocf::heartbeat:IPaddr2):       (target-role:Stopped) Stopped
     vgres      (ocf::heartbeat:LVM):   (target-role:Stopped) Stopped
     webvolfs   (ocf::heartbeat:Filesystem):    (target-role:Stopped) Stopped
     webres     (ocf::heartbeat:apache):        (target-role:Stopped) Stopped

PCSD Status:
  UA-HA: Online
  UA-HA2: Online

Daemon Status:
  corosync: active/enabled
  pacemaker: active/enabled
  pcsd: active/enabled
[root@UA-HA2 ~]#


10. How to start the resource group ? Use enable option for the RG.

[root@UA-HA2 ~]# pcs resource enable WEBRG1
[root@UA-HA2 ~]# pcs status
Cluster name: UABLR
Last updated: Mon Dec 28 21:14:04 2015          Last change: Mon Dec 28 21:14:01 2015 by root via crm_resource on UA-HA2
Stack: corosync
Current DC: UA-HA2 (version 1.1.13-10.el7-44eb2dd) - partition with quorum
2 nodes and 4 resources configured

Online: [ UA-HA UA-HA2 ]

Full list of resources:

 Resource Group: WEBRG1
     ClusterIP  (ocf::heartbeat:IPaddr2):       Started UA-HA2
     vgres      (ocf::heartbeat:LVM):   Started UA-HA2
     webvolfs   (ocf::heartbeat:Filesystem):    Started UA-HA2
     webres     (ocf::heartbeat:apache):        Started UA-HA2

PCSD Status:
  UA-HA: Online
  UA-HA2: Online

Daemon Status:
  corosync: active/enabled
  pacemaker: active/enabled
  pcsd: active/enabled
[root@UA-HA2 ~]#


Note:
Redhat cluster (Pacemaker/corosync) have many parameters like resource stickiness and failure counts.These attributes will play a role that where to start the resources.


To clear the errors , use the following command

# pcs resource cleanup 


To clear the resource fail counts , use the following command.

 [root@UA-HA2 ~]# pcs resource clear ClusterIP
[root@UA-HA2 ~]# pcs resource clear vgres
[root@UA-HA2 ~]# pcs resource clear webvolfs
[root@UA-HA2 ~]# pcs resource clear webres
[root@UA-HA2 ~]#


Hope this article is informative to you.


Share it ! Comment it !! Be Sociable !!!

The post RHEL 7 – Pacemaker – Cluster Resources/Group Management – Part 6 appeared first on UnixArena.

RHEL 7 – Pacemaker – Configuring HA KVM guest – Part 7

$
0
0

If you have followed the KVM article series in UnixArena , you might have read the article which talks about the KVM guest live migration. KVM supports the Guest Live migration (similar to VMware vMotion) but to provide high availability , you need need a cluster setup . (Like VMware HA).  In this article ,we will configure the KVM guest as cluster resource with live migration support. If you move the KVM guest resource manually , cluster will perform the live migration and if any hardware failure or hypervisor failure happens on KVM host, guest will be started on available cluster node (with minimal downtime). I will be using the existing KVM  and redhat cluster setup  to demonstrate this.


  • KVM Hyper-visor – RHEL 7.2
  • Redhat cluster Nodes – UA-HA & UA-HA2
  • Shared storage – NFS   (As a alternative , you can also use GFS2 )
  • KVM guest – UAKVM2


HA KVM guest using Pacemaker


1. Login to one of the cluster node and halt the KVM guest.

[root@UA-HA ~]# virsh shutdown UAKVM2
[root@UA-HA ~]# virsh list --all
 Id    Name                           State
----------------------------------------------------
 -     UAKVM2                         shut off

[root@UA-HA ~]#


2.Copy the Guest domain configuration file (XML) to NFS path.

[root@UA-HA qemu_config]# cd /etc/libvirt/qemu/
[root@UA-HA qemu]# ls -lrt
total 8
drwx------. 3 root root   40 Dec 14 09:13 networks
drwxr-xr-x. 2 root root    6 Dec 16 16:16 autostart
-rw-------  1 root root 3676 Dec 23 02:52 UAKVM2.xml
[root@UA-HA qemu]#
[root@UA-HA qemu]# cp UAKVM2.xml /kvmpool/qemu_config
[root@UA-HA qemu]# ls -lrt /kvmpool/qemu_config
total 4
-rw------- 1 root root 3676 Dec 23 08:14 UAKVM2.xml
[root@UA-HA qemu]#


3. Un-define the KVM virtual guest. (To configure as cluster resource)

[root@UA-HA qemu]# virsh undefine UAKVM2
Domain UAKVM2 has been undefined

[root@UA-HA qemu]# virsh list --all
 Id    Name                           State
----------------------------------------------------

[root@UA-HA qemu]#


4. Check the pacemaker cluster status.

[root@UA-HA ~]# pcs status
Cluster name: UABLR
Last updated: Mon Dec 28 22:44:59 2015          Last change: Mon Dec 28 21:16:56 2015 by root via crm_resource on UA-HA2
Stack: corosync
Current DC: UA-HA2 (version 1.1.13-10.el7-44eb2dd) - partition with quorum
2 nodes and 4 resources configured

Online: [ UA-HA UA-HA2 ]

Full list of resources:

 Resource Group: WEBRG1
     ClusterIP  (ocf::heartbeat:IPaddr2):       Started UA-HA2
     vgres      (ocf::heartbeat:LVM):   Started UA-HA2
     webvolfs   (ocf::heartbeat:Filesystem):    Started UA-HA2
     webres     (ocf::heartbeat:apache):        Started UA-HA2

PCSD Status:
  UA-HA: Online
  UA-HA2: Online

Daemon Status:
  corosync: active/enabled
  pacemaker: active/enabled
  pcsd: active/enabled
[root@UA-HA ~]#


5. To manage the KVM guest, you need to use resource agent called “VirtualDomain”. Let’s create a new virtual domain using the UAKVM2.xml file where we have stored in /kvmpool/qemu_config.

[root@UA-HA ~]# pcs resource create UAKVM2_res VirtualDomain hypervisor="qemu:///system" config="/kvmpool/qemu_config/UAKVM2.xml" migration_transport=ssh op start timeout="120s" op stop timeout="120s" op monitor  timeout="30" interval="10"  meta allow-migrate="true" priority="100" op migrate_from interval="0" timeout="120s" op migrate_to interval="0" timeout="120" --group UAKVM2
[root@UA-HA ~]#


6. Check the cluster status.

[root@UA-HA ~]# pcs status
Cluster name: UABLR
Last updated: Mon Dec 28 22:51:36 2015          Last change: Mon Dec 28 22:51:36 2015 by root via crm_resource on UA-HA
Stack: corosync
Current DC: UA-HA2 (version 1.1.13-10.el7-44eb2dd) - partition with quorum
2 nodes and 5 resources configured

Online: [ UA-HA UA-HA2 ]

Full list of resources:

 Resource Group: WEBRG1
     ClusterIP  (ocf::heartbeat:IPaddr2):       Started UA-HA2
     vgres      (ocf::heartbeat:LVM):   Started UA-HA2
     webvolfs   (ocf::heartbeat:Filesystem):    Started UA-HA2
     webres     (ocf::heartbeat:apache):        Started UA-HA2
 Resource Group: UAKVM2
     UAKVM2_res (ocf::heartbeat:VirtualDomain): Started UA-HA

PCSD Status:
  UA-HA: Online
  UA-HA2: Online

Daemon Status:
  corosync: active/enabled
  pacemaker: active/enabled
  pcsd: active/enabled
[root@UA-HA ~]#


7. KVM guest “UAKVM2” must be created and started automatically. Check the running VM using following command.

[root@UA-HA ~]# virsh list
 Id    Name                           State
----------------------------------------------------
 2     UAKVM2                         running

[root@UA-HA ~]#


8. Pacemaker also support the live KVM guest migration. To migrate the KVM guest to other KVM host on fly, use the following command.

[root@UA-HA ~]# pcs resource move UAKVM2 UA-HA2
[root@UA-HA ~]#

In the above command,

UAKVM2 refers the Resource group name & UA-HA2 refers the cluster node name


9. Check the cluster status.

[root@UA-HA ~]# pcs status
Cluster name: UABLR
Last updated: Mon Dec 28 22:54:51 2015          Last change: Mon Dec 28 22:54:38 2015 by root via crm_resource on UA-HA
Stack: corosync
Current DC: UA-HA2 (version 1.1.13-10.el7-44eb2dd) - partition with quorum
2 nodes and 5 resources configured

Online: [ UA-HA UA-HA2 ]

Full list of resources:

 Resource Group: WEBRG1
     ClusterIP  (ocf::heartbeat:IPaddr2):       Started UA-HA2
     vgres      (ocf::heartbeat:LVM):   Started UA-HA2
     webvolfs   (ocf::heartbeat:Filesystem):    Started UA-HA2
     webres     (ocf::heartbeat:apache):        Started UA-HA2
 Resource Group: UAKVM2
     UAKVM2_res (ocf::heartbeat:VirtualDomain): Started UA-HA2

PCSD Status:
  UA-HA: Online
  UA-HA2: Online

Daemon Status:
  corosync: active/enabled
  pacemaker: active/enabled
  pcsd: active/enabled
[root@UA-HA ~]#


10. List the VM using virsh command. You can see that VM is moved from UA-HA to UA-HA2.

[root@UA-HA ~]# virsh list --all
 Id    Name                           State
----------------------------------------------------

[root@UA-HA ~]# ssh UA-HA2 virsh list
 Id    Name                           State
----------------------------------------------------
 2     UAKVM2                         running

[root@UA-HA ~]#

During this migration , you will not even notice a single packet drop. That’s really cool.


Hope this article is informative to you . Share it ! Comment it !! Be Sociable !!!

The post RHEL 7 – Pacemaker – Configuring HA KVM guest – Part 7 appeared first on UnixArena.

RHEL 7 – Pacemaker – Cluster Node Management – Part 8

$
0
0

This article will demonstrates about the Pacemaker/Corosync cluster membership, node management and other  cluster operational tasks. Periodically , you might need to take the cluster node offline to perform the maintenance activities like OS package update/upgrade , hardware replacement/upgrade etc. In  such cases ,you need to put the cluster node in to standby mode to keep the cluster operational on other node to avoid the voting issue (In-case of two node cluster).  The cluster stand-by option is persistent across the cluster node reboot. So we no need to bother about the automatic resource start-up until we make the node as un-standby.

In the last section ,  we will see about the cluster maintenance mode which is completely different from the node standby & un-standby operations.  Cluster Maintenance is a preferred method if you are doing the online changes on the cluster nodes.

Pre-configured resources are vgres (LVM – volume group), webvolfs (Logical volume) , ClusterIP (HA IP address for website) , webres (Apache) and UAKVM2_res (HA KVM Guest ).

[root@UA-HA ~]# pcs resource
 Resource Group: WEBRG1
     vgres      (ocf::heartbeat:LVM):   Started UA-HA
     webvolfs   (ocf::heartbeat:Filesystem):    Started UA-HA
     ClusterIP  (ocf::heartbeat:IPaddr2):       Started UA-HA
     webres     (ocf::heartbeat:apache):        Started UA-HA
 Resource Group: UAKVM2
     UAKVM2_res (ocf::heartbeat:VirtualDomain): Started UA-HA2
[root@UA-HA ~]#


Cluster nodes are UA-HA & UA-HA2.

[root@UA-HA ~]# pcs cluster status
Cluster Status:
 Last updated: Sat Oct 17 11:58:23 2015         Last change: Sat Oct 17 11:57:48 2015 by root via crm_attribute on UA-HA
 Stack: corosync
 Current DC: UA-HA (version 1.1.13-10.el7-44eb2dd) - partition with quorum
 2 nodes and 5 resources configured
 Online: [ UA-HA UA-HA2 ]

PCSD Status:
  UA-HA: Online
  UA-HA2: Online
[root@UA-HA ~]#


Move a Cluster node in to the Standby Mode:

1. Login to one of the cluster node with root user and check node status.

[root@UA-HA ~]# pcs status nodes
Pacemaker Nodes:
 Online: UA-HA UA-HA2
 Standby:
 Offline:
Pacemaker Remote Nodes:
 Online:
 Standby:
 Offline:
[root@UA-HA ~]#


2. Verify the cluster status.

[root@UA-HA ~]# pcs status
Cluster name: UABLR
Last updated: Sat Oct 17 12:00:35 2015          Last change: Sat Oct 17 11:57:48 2015 by root via crm_attribute on UA-HA
Stack: corosync
Current DC: UA-HA (version 1.1.13-10.el7-44eb2dd) - partition with quorum
2 nodes and 5 resources configured

Online: [ UA-HA UA-HA2 ]

Full list of resources:

 Resource Group: WEBRG1
     vgres      (ocf::heartbeat:LVM):   Started UA-HA
     webvolfs   (ocf::heartbeat:Filesystem):    Started UA-HA
     ClusterIP  (ocf::heartbeat:IPaddr2):       Started UA-HA
     webres     (ocf::heartbeat:apache):        Started UA-HA
 Resource Group: UAKVM2
     UAKVM2_res (ocf::heartbeat:VirtualDomain): Started UA-HA2

PCSD Status:
  UA-HA: Online
  UA-HA2: Online

Daemon Status:
  corosync: active/enabled
  pacemaker: active/enabled
  pcsd: active/enabled
[root@UA-HA ~]#


3.You can also use the crm_mon to monitor the cluster status in real time.

[root@UA-HA ~]# crm_mon
Last updated: Sat Oct 17 12:05:50 2015          Last change: Sat Oct 17 12:04:28 2015 by root via cibadmin on UA-HA
Stack: corosync
Current DC: UA-HA (version 1.1.13-10.el7-44eb2dd) - partition with quorum
2 nodes and 5 resources configured

Online: [ UA-HA UA-HA2 ]

 Resource Group: WEBRG1
     vgres      (ocf::heartbeat:LVM):   Started UA-HA
     webvolfs   (ocf::heartbeat:Filesystem):    Started UA-HA
     ClusterIP  (ocf::heartbeat:IPaddr2):       Started UA-HA
     webres     (ocf::heartbeat:apache):        Started UA-HA
 Resource Group: UAKVM2
     UAKVM2_res (ocf::heartbeat:VirtualDomain): Started UA-HA2


To terminate the crm_mon, press control+c.

[root@UA-HA ~]# crm_mon
Connection to the CIB terminated
[root@UA-HA ~]#


4. To move the specific node in to standby mode , use the following command.

[root@UA-HA ~]# pcs cluster standby UA-HA2
[root@UA-HA ~]#


Check the cluster status again,

[root@UA-HA ~]# pcs status
Cluster name: UABLR
Last updated: Sat Oct 17 12:09:35 2015          Last change: Sat Oct 17 12:09:23 2015 by root via crm_attribute on UA-HA
Stack: corosync
Current DC: UA-HA (version 1.1.13-10.el7-44eb2dd) - partition with quorum
2 nodes and 5 resources configured

Node UA-HA2: standby
Online: [ UA-HA ]

Full list of resources:

 Resource Group: WEBRG1
     vgres      (ocf::heartbeat:LVM):   Started UA-HA
     webvolfs   (ocf::heartbeat:Filesystem):    Started UA-HA
     ClusterIP  (ocf::heartbeat:IPaddr2):       Started UA-HA
     webres     (ocf::heartbeat:apache):        Started UA-HA
 Resource Group: UAKVM2
     UAKVM2_res (ocf::heartbeat:VirtualDomain): Started UA-HA

PCSD Status:
  UA-HA: Online
  UA-HA2: Online

Daemon Status:
  corosync: active/enabled
  pacemaker: active/enabled
  pcsd: active/enabled
[root@UA-HA ~]#

You can see that Resource Group “UAKVM2” is automatically moved from UA-HA2 to UA-HA. You can perform the maintenance activity on UA-HA2 without worrying about the cluster membership and automatic resource start-up.


5. Check the cluster membership status. (Quorum status).

[root@UA-HA ~]# pcs status corosync

Membership information
----------------------
    Nodeid      Votes Name
         2          1 UA-HA2
         1          1 UA-HA (local)
[root@UA-HA ~]#

OR

[root@UA-HA ~]# corosync-quorumtool
Quorum information
------------------
Date:             Sat Oct 17 12:15:54 2015
Quorum provider:  corosync_votequorum
Nodes:            2
Node ID:          1
Ring ID:          2296
Quorate:          Yes

Votequorum information
----------------------
Expected votes:   2
Highest expected: 2
Total votes:      2
Quorum:           1
Flags:            2Node Quorate WaitForAll

Membership information
----------------------
    Nodeid      Votes Name
         2          1 UA-HA2
         1          1 UA-HA (local)
[root@UA-HA ~]#


Even though node UA-HA2 is standby mode, it still provides the vote to the cluster. If you have halted the node “UA-HA2” for maintenance activity, quorum status will change like below.

[root@UA-HA ~]# corosync-quorumtool
Quorum information
------------------
Date:             Sat Oct 17 12:16:25 2015
Quorum provider:  corosync_votequorum
Nodes:            1
Node ID:          1
Ring ID:          2300
Quorate:          Yes

Votequorum information
----------------------
Expected votes:   2
Highest expected: 2
Total votes:      1
Quorum:           1
Flags:            2Node Quorate WaitForAll

Membership information
----------------------
    Nodeid      Votes Name
         1          1 UA-HA (local)
[root@UA-HA ~]#


Clear the Standby Mode:

1. Once the maintenance is completed for UA-HA2 , just make it as un-standby to make the cluster node available for operation.

[root@UA-HA ~]# pcs cluster unstandby UA-HA2
[root@UA-HA ~]# pcs status
Cluster name: UABLR
Last updated: Sat Oct 17 12:29:21 2015          Last change: Sat Oct 17 12:29:19 2015 by root via crm_attribute on UA-HA
Stack: corosync
Current DC: UA-HA (version 1.1.13-10.el7-44eb2dd) - partition with quorum
2 nodes and 5 resources configured

Online: [ UA-HA UA-HA2 ]

Full list of resources:

 Resource Group: WEBRG1
     vgres      (ocf::heartbeat:LVM):   Started UA-HA
     webvolfs   (ocf::heartbeat:Filesystem):    Started UA-HA
     ClusterIP  (ocf::heartbeat:IPaddr2):       Started UA-HA
     webres     (ocf::heartbeat:apache):        Started UA-HA
 Resource Group: UAKVM2
     UAKVM2_res (ocf::heartbeat:VirtualDomain): Started UA-HA

PCSD Status:
  UA-HA: Online
  UA-HA2: Online

Daemon Status:
  corosync: active/enabled
  pacemaker: active/enabled
  pcsd: active/enabled
[root@UA-HA ~]#


2.You could move the desired resource group to UA-HA2 .

[root@UA-HA ~]# pcs resource move UAKVM2 UA-HA2
[root@UA-HA ~]# pcs status
Cluster name: UABLR
Last updated: Sat Oct 17 12:32:05 2015          Last change: Sat Oct 17 12:29:19 2015 by root via crm_attribute on UA-HA
Stack: corosync
Current DC: UA-HA (version 1.1.13-10.el7-44eb2dd) - partition with quorum
2 nodes and 5 resources configured

Online: [ UA-HA UA-HA2 ]

Full list of resources:

 Resource Group: WEBRG1
     vgres      (ocf::heartbeat:LVM):   Started UA-HA
     webvolfs   (ocf::heartbeat:Filesystem):    Started UA-HA
     ClusterIP  (ocf::heartbeat:IPaddr2):       Started UA-HA
     webres     (ocf::heartbeat:apache):        Started UA-HA
 Resource Group: UAKVM2
     UAKVM2_res (ocf::heartbeat:VirtualDomain): Started UA-HA2

PCSD Status:
  UA-HA: Online
  UA-HA2: Online

Daemon Status:
  corosync: active/enabled
  pacemaker: active/enabled
  pcsd: active/enabled
[root@UA-HA ~]#


We have successfully put the node “UA-HA2” in to the maintenance mode and revert it back.


How to stop/start the cluster services on specific node ?

1.Check the cluster status.

[root@UA-HA log]# pcs status
Cluster name: UABLR
Last updated: Sat Oct 17 16:53:02 2015          Last change: Sat Oct 17 16:52:21 2015 by root via crm_resource on UA-HA
Stack: corosync
Current DC: UA-HA2 (version 1.1.13-10.el7-44eb2dd) - partition with quorum
2 nodes and 5 resources configured

Online: [ UA-HA UA-HA2 ]

Full list of resources:

 Resource Group: WEBRG1
     vgres      (ocf::heartbeat:LVM):   Started UA-HA2
     webvolfs   (ocf::heartbeat:Filesystem):    Started UA-HA2
     ClusterIP  (ocf::heartbeat:IPaddr2):       Started UA-HA2
     webres     (ocf::heartbeat:apache):        Started UA-HA2
 Resource Group: UAKVM2
     UAKVM2_res (ocf::heartbeat:VirtualDomain): Started UA-HA

PCSD Status:
  UA-HA: Online
  UA-HA2: Online

Daemon Status:
  corosync: active/enabled
  pacemaker: active/enabled
  pcsd: active/enabled
[root@UA-HA log]#


2.Let’s plan to stop the cluster services on UA-HA. As per the cluster status, group “UAKVM2” is running on UA-HA.


3.Stop the cluster services on UA-HA and let’s see what happens to the group. From UA-HA node, execute the following command.

[root@UA-HA log]# pcs cluster stop
Stopping Cluster (pacemaker)... Stopping Cluster (corosync)...
[root@UA-HA log]# pcs status
Error: cluster is not currently running on this node
[root@UA-HA log]#


Since pcsd daemon is stopped, you can’t check the cluster status from UA-HA. Let’s check from UA-HA2 node.

[root@UA-HA log]# ssh UA-HA2 pcs status
Cluster name: UABLR
Last updated: Sun Jan 10 12:13:52 2016          Last change: Sun Jan 10 12:05:47 2016 by root via crm_resource on UA-HA
Stack: corosync
Current DC: UA-HA2 (version 1.1.13-10.el7-44eb2dd) - partition with quorum
2 nodes and 5 resources configured

Online: [ UA-HA2 ]
OFFLINE: [ UA-HA ]

Full list of resources:

 Resource Group: WEBRG1
     vgres      (ocf::heartbeat:LVM):   Started UA-HA2
     webvolfs   (ocf::heartbeat:Filesystem):    Started UA-HA2
     ClusterIP  (ocf::heartbeat:IPaddr2):       Started UA-HA2
     webres     (ocf::heartbeat:apache):        Started UA-HA2
 Resource Group: UAKVM2
     UAKVM2_res (ocf::heartbeat:VirtualDomain): Started UA-HA2

PCSD Status:
  UA-HA: Online
  UA-HA2: Online

Daemon Status:
  corosync: active/enabled
  pacemaker: active/enabled
  pcsd: active/enabled
[root@UA-HA log]#


Group “UAKVM2”  has been automatically moved to UA-HA2. What happens , if you start the cluster services on UA-HA ?

[root@UA-HA log]# pcs cluster start
Starting Cluster...
[root@UA-HA log]# pcs constraint
Location Constraints:
Ordering Constraints:
Colocation Constraints:
[root@UA-HA log]# pcs status
Cluster name: UABLR
Last updated: Sat Oct 17 17:03:45 2015          Last change: Sun Jan 10 12:05:47 2016 by root via crm_resource on UA-HA
Stack: corosync
Current DC: UA-HA2 (version 1.1.13-10.el7-44eb2dd) - partition with quorum
2 nodes and 5 resources configured

Online: [ UA-HA UA-HA2 ]

Full list of resources:

 Resource Group: WEBRG1
     vgres      (ocf::heartbeat:LVM):   Started UA-HA2
     webvolfs   (ocf::heartbeat:Filesystem):    Started UA-HA2
     ClusterIP  (ocf::heartbeat:IPaddr2):       Started UA-HA2
     webres     (ocf::heartbeat:apache):        Started UA-HA2
 Resource Group: UAKVM2
     UAKVM2_res (ocf::heartbeat:VirtualDomain): Started UA-HA

PCSD Status:
  UA-HA: Online
  UA-HA2: Online

Daemon Status:
  corosync: active/enabled
  pacemaker: active/enabled
  pcsd: active/enabled
[root@UA-HA log]#

Group UAKVM2 is automatically move back to UA-HA.


If you do not want to move the resource group automatically ,

1. “BAN” the resource group  in which you would like to stop the cluster services.

[root@UA-HA log]# pcs resource ban UAKVM2 UA-HA
Warning: Creating location constraint cli-ban-UAKVM2-on-UA-HA with a score of -INFINITY for resource UAKVM2 on node UA-HA.
This will prevent UAKVM2 from running on UA-HA until the constraint is removed. This will be the case even if UA-HA is the last node in the cluster.


2. Resource group will be automatically moved to other nodes in the cluster.

[root@UA-HA log]# pcs status
Cluster name: UABLR
Last updated: Sat Oct 17 17:18:25 2015          Last change: Sat Oct 17 17:17:48 2015 by root via crm_resource on UA-HA
Stack: corosync
Current DC: UA-HA2 (version 1.1.13-10.el7-44eb2dd) - partition with quorum
2 nodes and 5 resources configured

Online: [ UA-HA UA-HA2 ]

Full list of resources:

 Resource Group: WEBRG1
     vgres      (ocf::heartbeat:LVM):   Started UA-HA2
     webvolfs   (ocf::heartbeat:Filesystem):    Started UA-HA2
     ClusterIP  (ocf::heartbeat:IPaddr2):       Started UA-HA2
     webres     (ocf::heartbeat:apache):        Started UA-HA2
 Resource Group: UAKVM2
     UAKVM2_res (ocf::heartbeat:VirtualDomain): Started UA-HA2

PCSD Status:
  UA-HA: Online
  UA-HA2: Online

Daemon Status:
  corosync: active/enabled
  pacemaker: active/enabled
  pcsd: active/enabled
[root@UA-HA log]#


3. Cluster creates a constraints to prevent the group starting from the specific node.

[root@UA-HA log]# pcs constraint
Location Constraints:
  Resource: UAKVM2
    Disabled on: UA-HA (score:-INFINITY) (role: Started)
Ordering Constraints:
Colocation Constraints:


4. stop the cluster service. (If you want to stop the cluster service on the specific node).

5. Start the cluster service.

6. Move the resource group back to the system on desired time.


Cluster Maintenance Mode: (Online)

If you would like to perform the software upgrades and configuration changes which impacts the cluster resources, you need to make the cluster in to maintenance mode . So that all the resources will be tagged as un-managed by pacemaker. Which means , Pacemaker monitoring will be turned off and no action will be taken by cluster until you remove the maintenance mode. This is one of the useful feature to upgrade the cluster components and perform the other resource changes.

1. To move the cluster in to maintenance mode, use the following command.

[root@UA-HA ~]# pcs property set maintenance-mode=true


2. Check the Cluster Property

[root@UA-HA ~]# pcs property list
Cluster Properties:
cluster-infrastructure: corosync
cluster-name: UABLR
dc-version: 1.1.13-10.el7-44eb2dd
have-watchdog: false
last-lrm-refresh: 1452507397
maintenance-mode: true
stonith-enabled: false


3. Check the cluster status. Resources are set to unmanaged Flag.

[root@UA-HA ~]# pcs status
Cluster name: UABLR
Last updated: Sun Oct 18 12:19:33 2015 Last change: Sun Oct 18 12:19:27 2015 by root via cibadmin on UA-HA
Stack: corosync
Current DC: UA-HA2 (version 1.1.13-10.el7-44eb2dd) - partition with quorum
2 nodes and 5 resources configured

Online: [ UA-HA UA-HA2 ]

Full list of resources:

Resource Group: WEBRG1
vgres (ocf::heartbeat:LVM): Started UA-HA2 (unmanaged)
webvolfs (ocf::heartbeat:Filesystem): Started UA-HA2 (unmanaged)
ClusterIP (ocf::heartbeat:IPaddr2): Started UA-HA2 (unmanaged)
webres (ocf::heartbeat:apache): Started UA-HA2 (unmanaged)
Resource Group: UAKVM2
UAKVM2_res (ocf::heartbeat:VirtualDomain): Started UA-HA (unmanaged)

PCSD Status:
UA-HA: Online
UA-HA2: Online

Daemon Status:
corosync: active/enabled
pacemaker: active/enabled
pcsd: active/enabled
[root@UA-HA ~]#


4. Resources are continuous to run even though you have stopped the cluster services.

[root@UA-HA ~]# pcs cluster stop --all
UA-HA: Stopping Cluster (pacemaker)...
UA-HA2: Stopping Cluster (pacemaker)...
UA-HA2: Stopping Cluster (corosync)...
UA-HA: Stopping Cluster (corosync)...
[root@UA-HA ~]# virsh list
 Id    Name                           State
----------------------------------------------------
 55    UAKVM2                         running

[root@UA-HA ~]#

Perform the maintenance activity which can be done without rebooting the system.


5. Start the cluster services.

[root@UA-HA ~]# pcs cluster start --all
UA-HA2: Starting Cluster...
UA-HA: Starting Cluster...
[root@UA-HA ~]#


6. Resource should still show as unmanaged & online.

Full list of resources:

 Resource Group: WEBRG1
     vgres      (ocf::heartbeat:LVM):   Started UA-HA2 (unmanaged)
     webvolfs   (ocf::heartbeat:Filesystem):    Started UA-HA2 (unmanaged)
     ClusterIP  (ocf::heartbeat:IPaddr2):       Started UA-HA2 (unmanaged)
     webres     (ocf::heartbeat:apache):        Started UA-HA2 (unmanaged)
 Resource Group: UAKVM2
     UAKVM2_res (ocf::heartbeat:VirtualDomain): Started UA-HA (unmanaged)


7. Clear the Maintenance mode.

[root@UA-HA ~]# pcs property set maintenance-mode=flase

OR

[root@UA-HA ~]# pcs property unset maintenance-mode


8. Verify the resource status.

[root@UA-HA ~]# pcs status
Cluster name: UABLR
Last updated: Sun Oct 18 12:41:59 2015          Last change: Sun Oct 18 12:41:51 2015 by root via cibadmin on UA-HA
Stack: corosync
Current DC: UA-HA2 (version 1.1.13-10.el7-44eb2dd) - partition with quorum
2 nodes and 5 resources configured

Online: [ UA-HA UA-HA2 ]

Full list of resources:

 Resource Group: WEBRG1
     vgres      (ocf::heartbeat:LVM):   Started UA-HA2
     webvolfs   (ocf::heartbeat:Filesystem):    Started UA-HA2
     ClusterIP  (ocf::heartbeat:IPaddr2):       Started UA-HA2
     webres     (ocf::heartbeat:apache):        Started UA-HA2
 Resource Group: UAKVM2
     UAKVM2_res (ocf::heartbeat:VirtualDomain): Started UA-HA

PCSD Status:
  UA-HA: Online
  UA-HA2: Online

Daemon Status:
  corosync: active/enabled
  pacemaker: active/enabled
  pcsd: active/enabled
[root@UA-HA ~]#


Hope this article is informative to you. Share it ! Comment it !! Be Sociable !!!

The post RHEL 7 – Pacemaker – Cluster Node Management – Part 8 appeared first on UnixArena.

RHEL 7 – Pacemaker – Define the Resource Behaviour – Part 9

$
0
0

In Pacemaker/Corosync cluster, there are may aspects/key elements that we need to understand before playing with cluster operations. Otherwise , it might cause unnecessary outage/downtime for the services. The most important elements are setting the preferred resource location , ordering (defining dependencies) , resource fail counts, resource-stickiness, colocation, clone, master/slave, promote/demote etc. Let’s go through the article and understand how these elements contributes in cluster operation. 


Cluster Status:

[root@UA-HA ~]# pcs status
Cluster name: UABLR
Last updated: Sat Oct 17 19:44:40 2015          Last change: Sun Jan 10 14:18:25 2016 by root via crm_resource on UA-HA2
Stack: corosync
Current DC: UA-HA2 (version 1.1.13-10.el7-44eb2dd) - partition with quorum
2 nodes and 5 resources configured

Online: [ UA-HA UA-HA2 ]

Full list of resources:

 Resource Group: WEBRG1
     vgres      (ocf::heartbeat:LVM):   Started UA-HA
     webvolfs   (ocf::heartbeat:Filesystem):    Started UA-HA
     ClusterIP  (ocf::heartbeat:IPaddr2):       Started UA-HA
     webres     (ocf::heartbeat:apache):        Started UA-HA
 Resource Group: UAKVM2
     UAKVM2_res (ocf::heartbeat:VirtualDomain): Started UA-HA

PCSD Status:
  UA-HA: Online
  UA-HA2: Online

Daemon Status:
  corosync: active/enabled
  pacemaker: active/enabled
  pcsd: active/enabled
[root@UA-HA ~]#


Preferred Resource Location:

Pacaemaker/corosync allows resource to choose the preferred location. You can defined the preferred location using  “pcs constraint” command. Here  we are just intimating “UAKVM2” resource’s preferred node as UA-HA with a score of 50. The score here indicates how badly we would like the resource to run somewhere.


[root@UA-HA ~]# pcs constraint location UAKVM2 prefers UA-HA=50
[root@UA-HA ~]# pcs constraint
Location Constraints:
  Resource: UAKVM2
    Enabled on: UA-HA (score:50)
Ordering Constraints:
Colocation Constraints:
[root@UA-HA ~]# pcs resource
 Resource Group: WEBRG1
     vgres      (ocf::heartbeat:LVM):   Started UA-HA
     webvolfs   (ocf::heartbeat:Filesystem):    Started UA-HA
     ClusterIP  (ocf::heartbeat:IPaddr2):       Started UA-HA
     webres     (ocf::heartbeat:apache):        Started UA-HA
 Resource Group: UAKVM2
     UAKVM2_res (ocf::heartbeat:VirtualDomain): Started UA-HA
[root@UA-HA ~]#


If you didn’t specify any score, then resource prefer to run all the time on UA-HA.  The default score is INFINITY.


From PCS Man Page,
 location <resource id> prefers <node[=score]>...
        Create a location constraint on a resource to prefer the specified
        node and score (default score: INFINITY)

    location <resource id> avoids <node[=score]>...
        Create a location constraint on a resource to avoid the specified
        node and score (default score: INFINITY)


Using location constraint, you can also avoid specific node to run  a particular resource.

[root@UA-HA ~]# pcs constraint location UAKVM2 avoids UA-HA2=50
[root@UA-HA ~]# pcs constraint
Location Constraints:
  Resource: UAKVM2
    Enabled on: UA-HA (score:50)
    Disabled on: UA-HA2 (score:-50)
Ordering Constraints:
Colocation Constraints:
[root@UA-HA ~]#


At any time , you can remove the location constraint using the constraint ID.

To get the constraint id, use “–full” option.

[root@UA-HA ~]# pcs constraint --full
Location Constraints:
  Resource: UAKVM2
    Enabled on: UA-HA (score:50) (id:location-UAKVM2-UA-HA-50)
    Disabled on: UA-HA2 (score:-50) (id:location-UAKVM2-UA-HA2--50)
Ordering Constraints:
Colocation Constraints:
[root@UA-HA ~]#


Remove the constraint which we have created.

[root@UA-HA ~]# pcs constraint location remove location-UAKVM2-UA-HA-50
[root@UA-HA ~]# pcs constraint location remove location-UAKVM2-UA-HA2--50
[root@UA-HA ~]# pcs constraint
Location Constraints:
Ordering Constraints:
Colocation Constraints:
[root@UA-HA ~]#


When defining constraints, you also need to deal with scores. Scores of all kinds are integral to how the cluster works. Practically everything from migrating a resource to deciding which resource to stop in a degraded cluster is achieved by manipulating scores in some way. Scores are calculated on a per-resource basis and any node with a negative score for a resource cannot run that resource. After calculating the scores for a resource, the cluster then chooses the node with the highest score. INFINITY is currently defined as 1,000,000. Additions or subtractions with it stick to the following three basic rules:

Any value + INFINITY = INFINITY

Any value – INFINITY = -INFINITY

INFINITY – INFINITY = -INFINITY

When defining resource constraints, you specify a score for each constraint. The score indicates the value you are assigning to this resource constraint. Constraints with higher scores are applied before those with lower scores. By creating additional location constraints with different scores for a given resource, you can specify an order for the nodes that a resource will fail over to.


Resource Ordering: (Defining Resource dependencies):

You need to define the resource ordering if you are not using the resource groups. Most of the cases , resources are need to start in sequential. For an example, File-system resource can’t be started prior to volume group resource. Similar to that IP resource should be on-line before starting the Apache resource.

Let’s assume that we do not have the resource group and following resources are configured in cluster

[root@UA-HA ~]# pcs resource
     vgres      (ocf::heartbeat:LVM):   Started UA-HA2
     webvolfs   (ocf::heartbeat:Filesystem):    Started UA-HA2
     ClusterIP  (ocf::heartbeat:IPaddr2):       Started UA-HA2
     webres     (ocf::heartbeat:apache):        Started UA-HA2


At this point , no constraint has been configured.

[root@UA-HA ~]# pcs constraint
Location Constraints:
Ordering Constraints:
Colocation Constraints:
[root@UA-HA ~]#


Plan for the Resource order:

  1.   Volume Group (LVM)  – vgres
  2.   Filesystem – webvolfs   (To store the website data)
  3.   IP address – Cluster IP  (To access the website )
  4.   Apache –  webres    (To provide the web services)


To achieve the above resource order, use the following set of commands.

[root@UA-HA ~]# pcs constraint order vgres then webvolfs
Adding vgres webvolfs (kind: Mandatory) (Options: first-action=start then-action=start)
[root@UA-HA ~]# pcs constraint order webvolfs then ClusterIP
Adding webvolfs ClusterIP (kind: Mandatory) (Options: first-action=start then-action=start)
[root@UA-HA ~]# pcs constraint order ClusterIP then webres
Adding ClusterIP webres (kind: Mandatory) (Options: first-action=start then-action=start)
[root@UA-HA ~]# pcs constraint
Location Constraints:
Ordering Constraints:
  start vgres then start webvolfs (kind:Mandatory)
  start webvolfs then start ClusterIP (kind:Mandatory)
  start ClusterIP then start webres (kind:Mandatory)
Colocation Constraints:
[root@UA-HA ~]#

We have successfully configured the resource dependencies.


To remove the resource dependencies, use the following set of commands.
1. List the constraints with id.

[root@UA-HA ~]# pcs constraint --full
Location Constraints:
Ordering Constraints:
  start vgres then start webvolfs (kind:Mandatory) (id:order-vgres-webvolfs-mandatory)
  start webvolfs then start ClusterIP (kind:Mandatory) (id:order-webvolfs-ClusterIP-mandatory)
  start ClusterIP then start webres (kind:Mandatory) (id:order-ClusterIP-webres-mandatory)
Colocation Constraints:
[root@UA-HA ~]#

2. Remove the order constraint using following command.

[root@UA-HA ~]# pcs constraint order remove vgres order-vgres-webvolfs-mandatory
[root@UA-HA ~]# pcs constraint order remove webvolfs order-webvolfs-ClusterIP-mandatory
[root@UA-HA ~]# pcs constraint order remove ClusterIP order-ClusterIP-webres-mandatory
[root@UA-HA ~]#  pcs constraint --full
Location Constraints:
Ordering Constraints:
Colocation Constraints:
[root@UA-HA ~]#
You need to configure the resource order constraint when you do not have the resource group. If you have resource group, it does the resource ordering and reduces the manual work.


Resource fail counts & Migration Threshold:

Migration thresholds defines that how many times failed resource should try to start on the running node. For an example, if you define migration-threshold=2  for a resource , it will automatically migrate to a new node after 2 failures.

To set the migration threshold, use the following command.


[root@UA-HA ~]# pcs resource update  UAKVM2_res meta migration-threshold="4"
[root@UA-HA ~]# pcs resource show UAKVM2_res
 Resource: UAKVM2_res (class=ocf provider=heartbeat type=VirtualDomain)
  Attributes: hypervisor=qemu:///system config=/kvmpool/qemu_config/UAKVM2.xml migration_transport=ssh
  Meta Attrs: allow-migrate=true priority=100 migration-threshold=4
  Operations: start interval=0s timeout=120s (UAKVM2_res-start-interval-0s)
              stop interval=0s timeout=120s (UAKVM2_res-stop-interval-0s)
              monitor interval=10 timeout=30 (UAKVM2_res-monitor-interval-10)
              migrate_from interval=0 timeout=120s (UAKVM2_res-migrate_from-interval-0)
              migrate_to interval=0 timeout=120 (UAKVM2_res-migrate_to-interval-0)
[root@UA-HA ~]#

Resource fail count will come in to play, when it reaches the configured  migration-threshold value. If this resource failed on running node , it will tried to start the resource on same node for 4 times. If it still fails, then it will move the resource to the next available node based configured constraint.


To see the fail counts , use the one of the following command.

[root@UA-HA ~]# pcs resource failcount show UAKVM2_res
Failcounts for UAKVM2_res
 UA-HA: 1
[root@UA-HA ~]# crm_failcount -r UAKVM2_res
scope=status  name=fail-count-UAKVM2_res value=1
[root@UA-HA ~]# 


Do you would like to reset the fail-counts manually ?

[root@UA-HA ~]# pcs resource cleanup UAKVM2_res
Waiting for 2 replies from the CRMd.. OK
Cleaning up UAKVM2_res on UA-HA, removing fail-count-UAKVM2_res
Cleaning up UAKVM2_res on UA-HA2, removing fail-count-UAKVM2_res

[root@UA-HA ~]#

OR

[root@UA-HA ~]# pcs resource failcount reset UAKVM2_res UA


Check the resource fail-count again.

[root@UA-HA ~]# crm_failcount  --r UAKVM2_res
scope=status  name=fail-count-UAKVM2_res value=0
[root@UA-HA ~]#
[root@UA-HA ~]# pcs resource failcount show UAKVM2_res
No failcounts for UAKVM2_res
[root@UA-HA ~]#


Resource-Stickiness:

In some circumstances, it is highly desirable to prevent healthy resources from being moved around the cluster. Moving resources almost always requires a period of downtime. For complex services like Oracle databases, this period can be quite long. To address this, Pacemaker has the concept of resource stickiness which controls how much a service prefers to stay running where it is.

1. Check the Resource status:

Full list of resources:

 Resource Group: WEBRG1
     vgres      (ocf::heartbeat:LVM):   Started UA-HA2
     webvolfs   (ocf::heartbeat:Filesystem):    Started UA-HA2
     ClusterIP  (ocf::heartbeat:IPaddr2):       Started UA-HA2
     webres     (ocf::heartbeat:apache):        Started UA-HA2
 Resource Group: UAKVM2
     UAKVM2_res (ocf::heartbeat:VirtualDomain): Started UA-HA


2. Let’s stop the cluster services on UA-HA.

[root@UA-HA ~]# pcs cluster stop
Stopping Cluster (pacemaker)... Stopping Cluster (corosync)...
[root@UA-HA ~]#


3. UAKVM2 resource group should be moved to UA-HA2 automatically.

[root@UA-HA ~]# ssh UA-HA2 pcs status
Cluster name: UABLR
Last updated: Mon Jan 11 05:30:25 2016          Last change: Mon Jan 11 05:29:44 2016 by root via crm_attribute on UA-HA
Stack: corosync
Current DC: UA-HA2 (version 1.1.13-10.el7-44eb2dd) - partition with quorum
2 nodes and 5 resources configured

Online: [ UA-HA2 ]
OFFLINE: [ UA-HA ]

Full list of resources:

 Resource Group: WEBRG1
     vgres      (ocf::heartbeat:LVM):   Started UA-HA2
     webvolfs   (ocf::heartbeat:Filesystem):    Started UA-HA2
     ClusterIP  (ocf::heartbeat:IPaddr2):       Started UA-HA2
     webres     (ocf::heartbeat:apache):        Started UA-HA2
 Resource Group: UAKVM2
     UAKVM2_res (ocf::heartbeat:VirtualDomain): Started UA-HA2


4. Start the cluster service on UA-HA and see what happens to UAKVM2.

[root@UA-HA ~]# pcs cluster start
Starting Cluster...
[root@UA-HA ~]# ssh UA-HA2 pcs status
Cluster name: UABLR
Last updated: Mon Jan 11 05:30:39 2016          Last change: Mon Jan 11 05:29:44 2016 by root via crm_attribute on UA-HA
Stack: corosync
Current DC: UA-HA2 (version 1.1.13-10.el7-44eb2dd) - partition with quorum
2 nodes and 5 resources configured

Online: [ UA-HA UA-HA2 ]

Full list of resources:

 Resource Group: WEBRG1
     vgres      (ocf::heartbeat:LVM):   Started UA-HA2
     webvolfs   (ocf::heartbeat:Filesystem):    Started UA-HA2
     ClusterIP  (ocf::heartbeat:IPaddr2):       Started UA-HA2
     webres     (ocf::heartbeat:apache):        Started UA-HA2
 Resource Group: UAKVM2
     UAKVM2_res (ocf::heartbeat:VirtualDomain): Started UA-HA

UAKVM2 is moved back to UA-HA node but this will create some sort downtime. If you have configured the resource-stickness, you could prevent the resource moving from one node to another.

[root@UA-HA ~]# pcs resource defaults resource-stickiness=100
[root@UA-HA ~]# pcs resource defaults
resource-stickiness: 100
[root@UA-HA ~]#

Perform Step 2 to Step 4 & see the difference . UAKVM2 should be running on UA-HA2.


colocation:

When the location of one resource depends on the location of another one, we call this colocation. I would say colocaiton and resource order required when you are not using resource group.

Assuming that you have configured the volume group resource and File-system resource. You have also configured the resource order that which one to start first. But cluster might try to start volume group resource on one node and filesystem resource on other node. In such a cases, we need to tell to the cluster that run the filesystem resource where you are running the volume group resource.

Let’s see that how we can configure the colocation between vgres (LVM VG) & webvolfs (filesystem).

[root@UA-HA ~]# pcs constraint colocation add vgres with webvolfs INFINITY
[root@UA-HA ~]# pcs constraint
Location Constraints:
Ordering Constraints:
Colocation Constraints:
  vgres with webvolfs (score:INFINITY)
[root@UA-HA ~]#

We have successfully configured the colocation parameter between vgres & webvolfs. In this case, webvolfs resource follows the vgres.

We will see clone,Master/slave and Promote/Demote stuffs  on up coming articles.

Hope this article is informative to you. Share it ! Comment it !! Be Sociable !!!

The post RHEL 7 – Pacemaker – Define the Resource Behaviour – Part 9 appeared first on UnixArena.


RHEL 7 – Pacemaker – Configure Redundant Corosync Links on Fly– Part 10

$
0
0

Corosync cluster engine provides the reliable inter-cluster communications between the cluster nodes. It syncs the cluster configuration across the cluster nodes all the time. It also maintains the cluster membership and notifies when quorum is achieved or lost. It provides the messaging layer inside the cluster to manage the system and resource availability. In Veritas cluster , this functionality has been provided by LLT + GAB (Low latency transport + Global Atomic Broadcast) . Unlike veritas cluster, Corosync uses the existing network interface to communicate with cluster nodes.


Why do we need  redundant corosync Links ?

By default ,we configure the network bonding by aggregating couple of physical network interfaces for primary node IP.  Corosync will use this interface as heartbeat link in default configurations. If there is an issue with network and lost the network connectivity between two nodes , cluster might need to face the split brain situation. To avoid split brain , we are configuring additional network links. This network link should be configured with different network switch or we can use the direct network cable between two nodes.

Note: For tutorial simplicity , we will use unicast (Not Multicast) for corosync.  Unicast method should be fine for two node clusters.


Configuring the additional corosync links is an online activity and can be done without impacting the services.


Let’s explore the existing configuration:

1. View the corosync configuration using pcs command.

[root@UA-HA ~]# pcs cluster corosync
totem {
    version: 2
    secauth: off
    cluster_name: UABLR
    transport: udpu
}

nodelist {
    node {
        ring0_addr: UA-HA
        nodeid: 1
    }

    node {
        ring0_addr: UA-HA2
        nodeid: 2
    }
}

quorum {
    provider: corosync_votequorum
    two_node: 1
}

logging {
    to_logfile: yes
    logfile: /var/log/cluster/corosync.log
    to_syslog: yes
}

[root@UA-HA ~]#


2. Corosync uses two UDP ports mcastport (for mcast receives) and mcastport – 1 (for mcast sends).

  • mcast receives: 5405
  • mcast sends: 5404
[root@UA-HA ~]# netstat -plantu | grep 54 |grep corosync
udp        0      0 192.168.203.134:5405    0.0.0.0:*                           34363/corosync
[root@UA-HA ~]#


3. Corosync configuration file is located in /etc/corosync.

[root@UA-HA ~]# cat /etc/corosync/corosync.conf
totem {
    version: 2
    secauth: off
    cluster_name: UABLR
    transport: udpu
}

nodelist {
    node {
        ring0_addr: UA-HA
        nodeid: 1
    }

    node {
        ring0_addr: UA-HA2
        nodeid: 2
    }
}

quorum {
    provider: corosync_votequorum
    two_node: 1
}

logging {
    to_logfile: yes
    logfile: /var/log/cluster/corosync.log
    to_syslog: yes
}
[root@UA-HA ~]#


4. Verify current ring Status using corosync-cfgtool.

[root@UA-HA ~]# corosync-cfgtool -s
Printing ring status.
Local node ID 1
RING ID 0
        id      = 192.168.203.134
        status  = ring 0 active with no faults
[root@UA-HA ~]# ssh UA-HA2 corosync-cfgtool -s
Printing ring status.
Local node ID 2
RING ID 0
        id      = 192.168.203.131
        status  = ring 0 active with no faults
[root@UA-HA ~]#


As we can see that only one ring has been configured for corosync and it uses the following interfaces from each node.

[root@UA-HA ~]# ifconfig br0
br0: flags=4163<UP,BROADCAST,RUNNING,MULTICAST>  mtu 1500
        inet 192.168.203.134  netmask 255.255.255.0  broadcast 192.168.203.255
        

[root@UA-HA ~]# ssh UA-HA2 ifconfig br0
br0: flags=4163<UP,BROADCAST,RUNNING,MULTICAST>  mtu 1500
        inet 192.168.203.131  netmask 255.255.255.0  broadcast 192.168.203.255
        
[root@UA-HA ~]#


Configure a new ring :


5. To add additional redundancy for corosync links, we will use the following interface on both nodes.

[root@UA-HA ~]# ifconfig eno33554984
eno33554984: flags=4163<UP,BROADCAST,RUNNING,MULTICAST>  mtu 1500
        inet 172.16.0.3  netmask 255.255.255.0  broadcast 172.16.0.255
        
[root@UA-HA ~]# ssh UA-HA2 ifconfig eno33554984
eno33554984: flags=4163<UP,BROADCAST,RUNNING,MULTICAST>  mtu 1500
        inet 172.16.0.2  netmask 255.255.255.0  broadcast 172.16.0.255
       
[root@UA-HA ~]#

Dedicated Private address for Corosync Links:
172.16.0.3 – UA-HA-HB2
172.16.0.2 – UA-HA2-HB2


6. Before making changes in corosync configuration, we need to move the cluster in to maintenance mode.

[root@UA-HA ~]# pcs property set maintenance-mode=true
[root@UA-HA ~]# pcs property show maintenance-mode
Cluster Properties:
 maintenance-mode: true
[root@UA-HA ~]#


This will eventually puts the resources in unmanaged state.

[root@UA-HA ~]# pcs resource
 Resource Group: WEBRG1
     vgres      (ocf::heartbeat:LVM):   Started UA-HA (unmanaged)
     webvolfs   (ocf::heartbeat:Filesystem):    Started UA-HA (unmanaged)
     ClusterIP  (ocf::heartbeat:IPaddr2):       Started UA-HA (unmanaged)
     webres     (ocf::heartbeat:apache):        Started UA-HA (unmanaged)
 Resource Group: UAKVM2
     UAKVM2_res (ocf::heartbeat:VirtualDomain): Started UA-HA2 (unmanaged)
[root@UA-HA ~]#


7. Update the /etc/hosts with following entries on both the nodes.

[root@UA-HA corosync]# cat /etc/hosts |grep HB2
172.16.0.3     UA-HA-HB2
172.16.0.2     UA-HA2-HB2
[root@UA-HA corosync]#


8. Update the corosync.conf with rrp_mode & ring1_addr.

[root@UA-HA corosync]# cat corosync.conf
totem {
    version: 2
    secauth: off
    cluster_name: UABLR
    transport: udpu
    rrp_mode: active
}

nodelist {
    node {
        ring0_addr: UA-HA
        ring1_addr: UA-HA-HB2
        nodeid: 1
    }

    node {
        ring0_addr: UA-HA2
        ring1_addr: UA-HA2-HB2
        nodeid: 2
    }
}

quorum {
    provider: corosync_votequorum
    two_node: 1
}

logging {
    to_logfile: yes
    logfile: /var/log/cluster/corosync.log
    to_syslog: yes
}
[root@UA-HA corosync]#


Here is the difference between previous configuration file vs New one.

[root@UA-HA corosync]# sdiff -s corosync.conf corosync.conf_back
   rrp_mode: active                                           <
        ring1_addr: UA-HA-HB2                                 <
        ring1_addr: UA-HA2-HB2                                <
[root@UA-HA corosync]#


9. Restart the corosync services on both the nodes.

[root@UA-HA ~]# systemctl restart corosync
[root@UA-HA ~]# ssh UA-HA2 systemctl restart corosync


10. Check the corosync service status.

[root@UA-HA ~]# systemctl status corosync
● corosync.service - Corosync Cluster Engine
   Loaded: loaded (/usr/lib/systemd/system/corosync.service; enabled; vendor preset: disabled)
   Active: active (running) since Mon 2015-10-19 02:38:16 EDT; 16s ago
  Process: 36462 ExecStop=/usr/share/corosync/corosync stop (code=exited, status=0/SUCCESS)
  Process: 36470 ExecStart=/usr/share/corosync/corosync start (code=exited, status=0/SUCCESS)
 Main PID: 36477 (corosync)
   CGroup: /system.slice/corosync.service
           └─36477 corosync

Oct 19 02:38:15 UA-HA corosync[36477]:  [QUORUM] Members[2]: 2 1
Oct 19 02:38:15 UA-HA corosync[36477]:  [MAIN  ] Completed service synchronization, ready to provide service.
Oct 19 02:38:16 UA-HA systemd[1]: Started Corosync Cluster Engine.
Oct 19 02:38:16 UA-HA corosync[36470]: Starting Corosync Cluster Engine (corosync): [  OK  ]
Oct 19 02:38:24 UA-HA corosync[36477]:  [TOTEM ] A new membership (192.168.203.134:3244) was formed. Members left: 2
Oct 19 02:38:24 UA-HA corosync[36477]:  [QUORUM] Members[1]: 1
Oct 19 02:38:24 UA-HA corosync[36477]:  [MAIN  ] Completed service synchronization, ready to provide service.
Oct 19 02:38:25 UA-HA corosync[36477]:  [TOTEM ] A new membership (192.168.203.131:3248) was formed. Members joined: 2
Oct 19 02:38:26 UA-HA corosync[36477]:  [QUORUM] Members[2]: 2 1
Oct 19 02:38:26 UA-HA corosync[36477]:  [MAIN  ] Completed service synchronization, ready to provide service.
[root@UA-HA ~]#


11. Verify the corosync configuration using pcs command.

[root@UA-HA ~]# pcs cluster corosync
totem {
    version: 2
    secauth: off
    cluster_name: UABLR
    transport: udpu
   rrp_mode: active
}

nodelist {
    node {
        ring0_addr: UA-HA
        ring1_addr: UA-HA-HB2
        nodeid: 1
    }

    node {
        ring0_addr: UA-HA2
        ring1_addr: UA-HA2-HB2
        nodeid: 2
    }
}

quorum {
    provider: corosync_votequorum
    two_node: 1
}

logging {
    to_logfile: yes
    logfile: /var/log/cluster/corosync.log
    to_syslog: yes
}

[root@UA-HA ~]#


12.Verify the ring status.

[root@UA-HA ~]# corosync-cfgtool -s
Printing ring status.
Local node ID 1
RING ID 0
        id      = 192.168.203.134
        status  = ring 0 active with no faults
RING ID 1
        id      = 172.16.0.3
        status  = ring 1 active with no faults
[root@UA-HA ~]# ssh UA-HA2 corosync-cfgtool -s
Printing ring status.
Local node ID 2
RING ID 0
        id      = 192.168.203.131
        status  = ring 0 active with no faults
RING ID 1
        id      = 172.16.0.2
        status  = ring 1 active with no faults
[root@UA-HA ~]#


You could also check the ring status using following command.

[root@UA-HA ~]# corosync-cmapctl |grep member
runtime.totem.pg.mrp.srp.members.1.config_version (u64) = 0
runtime.totem.pg.mrp.srp.members.1.ip (str) = r(0) ip(192.168.203.134) r(1) ip(172.16.0.3)
runtime.totem.pg.mrp.srp.members.1.join_count (u32) = 1
runtime.totem.pg.mrp.srp.members.1.status (str) = joined
runtime.totem.pg.mrp.srp.members.2.config_version (u64) = 0
runtime.totem.pg.mrp.srp.members.2.ip (str) = r(0) ip(192.168.203.131) r(1) ip(172.16.0.2)
runtime.totem.pg.mrp.srp.members.2.join_count (u32) = 1
runtime.totem.pg.mrp.srp.members.2.status (str) = joined
[root@UA-HA ~]#

We have successfully configured redundant rings  for corosync .


13. Clear the cluster maintenance mode.

[root@UA-HA ~]# pcs property unset maintenance-mode

or 

[root@UA-HA ~]#  pcs property set maintenance-mode=false

[root@UA-HA ~]# pcs resource
 Resource Group: WEBRG1
     vgres      (ocf::heartbeat:LVM):   Started UA-HA
     webvolfs   (ocf::heartbeat:Filesystem):    Started UA-HA
     ClusterIP  (ocf::heartbeat:IPaddr2):       Started UA-HA
     webres     (ocf::heartbeat:apache):        Started UA-HA
 Resource Group: UAKVM2
     UAKVM2_res (ocf::heartbeat:VirtualDomain): Started UA-HA2
[root@UA-HA ~]#


Let’s break it !!

You could easily test the rrp_mode by pulling out the network cable from one of the configured interface. I have just used “ifconfig br0 down” command to simulate this test on UA-HA2 node. Assuming that application/DB is using different interface.

[root@UA-HA ~]# ping UA-HA2
PING UA-HA2 (192.168.203.131) 56(84) bytes of data.
^C
--- UA-HA2 ping statistics ---
2 packets transmitted, 0 received, 100% packet loss, time 1002ms

[root@UA-HA ~]#


Check the ring status. We can see that ring 0 has been marked as faulty.

[root@UA-HA ~]# corosync-cfgtool -s
Printing ring status.
Local node ID 1
RING ID 0
        id      = 192.168.203.134
        status  = Marking ringid 0 interface 192.168.203.134 FAULTY
RING ID 1
        id      = 172.16.0.3
        status  = ring 1 active with no faults
[root@UA-HA ~]#


You could see that cluster is running perfectly without any issue.

[root@UA-HA ~]# pcs resource
 Resource Group: WEBRG1
     vgres      (ocf::heartbeat:LVM):   Started UA-HA
     webvolfs   (ocf::heartbeat:Filesystem):    Started UA-HA
     ClusterIP  (ocf::heartbeat:IPaddr2):       Started UA-HA
     webres     (ocf::heartbeat:apache):        Started UA-HA
 Resource Group: UAKVM2
     UAKVM2_res (ocf::heartbeat:VirtualDomain): Started UA-HA2
[root@UA-HA ~]#


Bring up the br0 interface using “ifconfig br0 up”. Ring 0 is back to online.

[root@UA-HA ~]# corosync-cfgtool -s
Printing ring status.
Local node ID 1
RING ID 0
        id      = 192.168.203.134
        status  = ring 0 active with no faults
RING ID 1
        id      = 172.16.0.3
        status  = ring 1 active with no faults
[root@UA-HA ~]#

Hope this article informative to you. Share it ! Comment it !! Be Sociable !!!

The post RHEL 7 – Pacemaker – Configure Redundant Corosync Links on Fly– Part 10 appeared first on UnixArena.

RHEL 7 – Accessing the Pacemaker WEB UI (GUI) – Part 11

$
0
0

Pacemaker offers web based user interface portal to manage the cluster. It also provides an interface to manage multiple clusters in single web UI. We can’t really say that WEB UI has all the options to manage the cluster. I would say that command line is much easier and simple when you compare to GUI. However , you could give a try for pacemaker web UI.  It  uses the port 2224  and you can access the web UI portal using “https://nodename:2224” .

Web UI is limited to perform the following tasks

  • Create the new cluster
  • Add existing cluster to the GUI
  • Manage the cluster nodes (stop , start, standby)
  • Configure the fence devices
  • Configure the cluster resources
  • Resource attributes (order, location, collocation, meta attributes )
  • Set the cluster properties.
  • Create a roles

I don’t see any option to switch over the resources from one node to another node .  Also there is no way to verify & configure the corosync rings.


Let’s access the web UI portal of pacemaker.

1. Doesn’t  require any additional setup to access the pacemaker web UI from cluster nodes. By default, pcs packages will be installed as a part of cluster package installation.


2.pcsd.service is responsible for  web UI.

[root@UA-HA ~]# systemctl status pcsd
● pcsd.service - PCS GUI and remote configuration interface
   Loaded: loaded (/usr/lib/systemd/system/pcsd.service; enabled; vendor preset: disabled)
   Active: active (running) since Mon 2015-10-19 14:46:06 EDT; 2s ago
 Main PID: 55297 (pcsd)
   CGroup: /system.slice/pcsd.service
           ├─55297 /bin/sh /usr/lib/pcsd/pcsd start
           ├─55301 /bin/bash -c ulimit -S -c 0 >/dev/null 2>&1 ; /usr/bin/ruby -I/usr/lib/pcsd /usr/lib/pcsd/ssl.rb
           ├─55302 /usr/bin/ruby -I/usr/lib/pcsd /usr/lib/pcsd/ssl.rb
           └─55315 python2 /usr/lib/pcsd/systemd-notify-fix.py

Oct 19 14:46:01 UA-HA systemd[1]: Starting PCS GUI and remote configuration interface...
Oct 19 14:46:06 UA-HA systemd[1]: Started PCS GUI and remote configuration interface.
[root@UA-HA ~]#


3. pcsd configuration daemon uses the account called “hacluster” . we have setup the password during the initial cluster setup.


4.Let’s launch the pacemaker Web UI. You could use any one of the node’s  IP address to access it.

Pacemaker Corosync Web UI
Pacemaker Corosync WEb UI


5. Login with “hacluster” user credentials .


6. By default, there won’t be any cluster added in to the portal. Since we have a configured cluster, let’s add to this web UI.  Click “+Add Existing” link.

Pacemaker Web UI - Add Cluster
Pacemaker Web UI – Add Cluster


7. Enter one of the cluster node IP address and click “Add Existing”.  This process will automatic pull the cluster information to Web UI.

Add the pacemaker cluster to Web UI


Same way you can add N number of clusters  to the single Web UI.  So that you can manage all the clusters from one place.


8. Select the cluster which you would like to manage using Web UI.

Select the cluster
Select the cluster


9.By default , it will take you to the “Nodes” tab.

Pacemaker Corosync Node status


Here you could see the following options.

  • Stop/start/restart the cluster services on specific node
  • Move the node in to standby mode.
  • Configure Fencing.


10. Have a look at the resource management tab.

Pacemaker Resource Management tab


11. Next tab is exclusively to configure & manage the fencing.


12. ACLS  tab provides an option to create the rule with custom rules. (Providing read only access to set of users / group)


13.  In “cluster properties” tab, you can find the following options.

Cluster properties
Cluster properties


14. The last tab is will take to you  (screen “step 8” )  cluster list.


I personally  felt that pacemaker web UI is limited to perform specific work.  The pacemaker (pcs) command line looks simple and powerful .

Hope this article is informative to you. Share it ! Comment it ! Be Sociable !!!

The post RHEL 7 – Accessing the Pacemaker WEB UI (GUI) – Part 11 appeared first on UnixArena.

RHEL 7 – How to configure the Fencing on Pacemaker ?

$
0
0

Fencing (STONITH) is an important mechanism in cluster to avoid the data corruption on shared storage. It also helps to bring the cluster into the known state when there is a split brain occurs between the nodes. Cluster nodes talks to each other over communication channels, which are typically standard network connections, such as Ethernet. Each resources and nodes have “state” (Ex: started , stopped) in the cluster and nodes report every changes that happens on resources. This reporting works well until communication breaks between the nodes. Fencing  will come to play when nodes can’t communicate with each other. Majority of nodes will form the cluster based on quorum votes and rest of the nodes will be rebooted or halted based on fencing actions what we have denied.


There are two type of fencing available in pacemaker.

  • Resource Level Fencing
  • Node Level Fencing

Using the resource level fencing, the cluster can make sure that a node cannot access same resources on both the nodes. The node level fencing makes sure that a node does not run any resources at all. This is usually done in a very simple, yet brutal way: the node is simply reset using a power switch. This may ultimately be necessary because the node may not be responsive at all.  In Pacamaker/corosync cluster, we will call the fencing method as “STONITH”  (Shoot The Other Node In The Head).


For more information , please visit clusterlabs.org . Here we will see the node level fencing.


Have a look at the cluster setup.

[root@Node1-LAB ~]# pcs status
Cluster name: GFSCLUS
Last updated: Wed Jan 20 12:43:36 2016
Last change: Wed Jan 20 09:57:06 2016 via cibadmin on Node1
Stack: corosync
Current DC: Node1 (1) - partition with quorum
Version: 1.1.10-29.el7-368c726
2 Nodes configured
2 Resources configured


Online: [ Node1 Node2 ]

PCSD Status:
  Node1: Online
  Node2: Online

Daemon Status:
  corosync: active/enabled
  pacemaker: active/enabled
  pcsd: active/enabled
[root@Node1-LAB ~]#


In this article ,we will see that how to configure stonith/fencing  “fence_xvm”  for KVM cluster nodes. The purpose of this setup is to demonstrate the STONITH/FENCING.


Environment:  (Demo Purpose only)

  • Node 1 & Node 2  – Pacemaker/corosync cluster
  • UNIXKB-CP  – KVM host which hosts Node1 & Node2


Configure KVM host to use fence_xvm:

1.Login to the KVM host.

2.List the running virtual Machines .

[root@UNIXKB-CP ~]# virsh list
 Id    Name                           State
----------------------------------------------------
 6     Node1                          running
 7     Node2                          running

[root@UNIXKB-CP ~]#


3.Install the required fencing packages on KVM host (Non-Cluster node)

[root@UNIXKB-CP ~]# yum install fence-virt fence-virtd fence-virtd-libvirt fence-virtd-multicast fence-virtd-serial
Loaded plugins: langpacks, product-id, subscription-manager
This system is not registered to Red Hat Subscription Management. You can use subscription-manager to register.
Package fence-virt-0.3.0-16.el7.x86_64 already installed and latest version
Package fence-virtd-0.3.0-16.el7.x86_64 already installed and latest version
Package fence-virtd-libvirt-0.3.0-16.el7.x86_64 already installed and latest version
Package fence-virtd-multicast-0.3.0-16.el7.x86_64 already installed and latest version
Package fence-virtd-serial-0.3.0-16.el7.x86_64 already installed and latest version
Nothing to do
[root@UNIXKB-CP ~]#


4. Create the new directory to store the fence key. Create the random key to use for fencing.

[root@UNIXKB-CP ~]# mkdir -p /etc/cluster
[root@UNIXKB-CP ~]# cd /etc/cluster/
[root@UNIXKB-CP cluster]# dd if=/dev/urandom of=/etc/cluster/fence_xvm.key bs=4k count=1
1+0 records in
1+0 records out
4096 bytes (4.1 kB) copied, 0.000506736 s, 8.1 MB/s
[root@UNIXKB-CP cluster]#


5. Copy the fence keys to cluster nodes. (Node1 & Node2)

[root@UNIXKB-CP cluster]# scp -r /etc/cluster/fence_xvm.key root@Node1:/etc/cluster/fence_xvm.key
root@node1's password:
fence_xvm.key                                                                                                                      100% 4096     4.0KB/s   00:00
[root@UNIXKB-CP cluster]# scp -r /etc/cluster/fence_xvm.key root@Node2:/etc/cluster/fence_xvm.key
root@node2's password:
fence_xvm.key                                                                                                                      100% 4096     4.0KB/s   00:00
[root@UNIXKB-CP cluster]#

Note: You must create a “/etc/cluster” directory on the cluster nodes in an order to copy the xvm keys.


6.Use “fence_virtd -c” command to create “/etc/fence_virt.conf” file.

[root@UNIXKB-CP ~]# fence_virtd -c
Module search path [/usr/lib64/fence-virt]:

Available backends:
    libvirt 0.1
Available listeners:
    multicast 1.2

Listener modules are responsible for accepting requests
from fencing clients.

Listener module [multicast]:

The multicast listener module is designed for use environments
where the guests and hosts may communicate over a network using
multicast.

The multicast address is the address that a client will use to
send fencing requests to fence_virtd.

Multicast IP Address [225.0.0.12]:

Using ipv4 as family.

Multicast IP Port [1229]:

Setting a preferred interface causes fence_virtd to listen only
on that interface.  Normally, it listens on all interfaces.
In environments where the virtual machines are using the host
machine as a gateway, this *must* be set (typically to virbr0).
Set to 'none' for no interface.

Interface [virbr0]: br0:1

The key file is the shared key information which is used to
authenticate fencing requests.  The contents of this file must
be distributed to each physical host and virtual machine within
a cluster.

Key File [/etc/cluster/fence_xvm.key]:

Backend modules are responsible for routing requests to
the appropriate hypervisor or management layer.

Backend module [libvirt]:

Configuration complete.

=== Begin Configuration ===
backends {
        libvirt {
                uri = "qemu:///system";
        }

}

listeners {
        multicast {
                port = "1229";
                family = "ipv4";
                interface = "br0:1";
                address = "225.0.0.12";
                key_file = "/etc/cluster/fence_xvm.key";
        }

}

fence_virtd {
        module_path = "/usr/lib64/fence-virt";
        backend = "libvirt";
        listener = "multicast";
}

=== End Configuration ===
Replace /etc/fence_virt.conf with the above [y/N]? y
[root@UNIXKB-CP ~]#

Make sure that you are proving the correct interface as the bridge. In My setup , I am using br0:1 virtual interface to communicate with KVM guests.


7. Start the fence_virtd service.

[root@UNIXKB-CP ~]# systemctl enable fence_virtd.service
[root@UNIXKB-CP ~]# systemctl start fence_virtd.service
[root@UNIXKB-CP ~]# systemctl status fence_virtd.service
fence_virtd.service - Fence-Virt system host daemon
   Loaded: loaded (/usr/lib/systemd/system/fence_virtd.service; enabled)
   Active: active (running) since Wed 2016-01-20 23:36:14 IST; 1s ago
  Process: 3530 ExecStart=/usr/sbin/fence_virtd $FENCE_VIRTD_ARGS (code=exited, status=0/SUCCESS)
 Main PID: 3531 (fence_virtd)
   CGroup: /system.slice/fence_virtd.service
           └─3531 /usr/sbin/fence_virtd -w

Jan 20 23:36:14 UNIXKB-CP systemd[1]: Starting Fence-Virt system host daemon...
Jan 20 23:36:14 UNIXKB-CP systemd[1]: Started Fence-Virt system host daemon.
Jan 20 23:36:14 UNIXKB-CP fence_virtd[3531]: fence_virtd starting.  Listener: libvirt  Backend: multicast
[root@UNIXKB-CP ~]#


Configure the Fencing on Cluster Nodes:

1.Login to one of the cluster node.

2.Make sure that both the nodes have “fence_virt” package.

[root@Node1-LAB ~]# rpm -qa fence-virt
fence-virt-0.3.0-16.el7.x86_64
[root@Node1-LAB ~]#


3. The following commands much be scuesscced in an order to configure the fencing in cluster.

[root@Node1-LAB ~]# fence_xvm -o list
Node1                6daac670-c494-4e02-8d90-96cf900f2be9 on
Node2                17707dcb-7bcc-4b36-9498-a5963d86dc2f on
[root@Node1-LAB ~]#


4.Cluster nodes entry must be present in the /etc/hosts.

[root@Node1-LAB ~]# cat /etc/hosts |grep Node
192.168.2.10    Node1-LAB  Node1
192.168.2.11    Node2-LAB  Node2
[root@Node1-LAB ~]#


5.Configure fence_xvm fence agent on pacemaker cluster.

[root@Node1-LAB ~]# pcs stonith create xvmfence  fence_xvm key_file=/etc/cluster/fence_xvm.key
[root@Node1-LAB ~]# 
[root@Node1-LAB ~]# pcs stonith
 xvmfence       (stonith:fence_xvm):    Started
[root@Node1-LAB ~]#
[root@Node1-LAB ~]# pcs stonith --full
 Resource: xvmfence (class=stonith type=fence_xvm)
  Attributes: key_file=/etc/cluster/fence_xvm.key
  Operations: monitor interval=60s (xvmfence-monitor-interval-60s)
[root@Node1-LAB ~]#

We have successfully configure the fencing on RHEL 7 – Pacemaker/Corosync cluster. (Cluster has been configured between two KVM guests).


Validate the STONITH:


How should I test my “stonith” configuration ? Here is the small demonstration.

1. Login to the one of the cluster node.

2. Try to fence on of the node.

[root@Node1-LAB ~]# pcs stonith fence Node2
Node: Node2 fenced
[root@Node1-LAB ~]#


This will eventually reboot Node2 . Reboot happens based on cluster property.

[root@Node1-LAB ~]# pcs property --all |grep stonith-action
 stonith-action: reboot
[root@Node1-LAB ~]#


Stonith also can be ON/OFF using pcs property command.

[root@Node1-LAB ~]# pcs property --all |grep stonith-enabled
 stonith-enabled: true
[root@Node1-LAB ~]#


Hope this article is informative to you.

The post RHEL 7 – How to configure the Fencing on Pacemaker ? appeared first on UnixArena.

RHEL7 – Configuring GFS2 on Pacemaker/Corosync Cluster

$
0
0

This article will briefly explains about configuring the GFS2 filesystem between two cluster nodes. As you know that GFS2 is cluster filesystem and it can be mounted on more than one server at a time . Since multiple servers can mount the same filesystem, it uses the DLM (Dynamic Lock Manager) to prevent the data corruption. GFS2 requires a cluster suite to configure & manage. In RHEL 7 , Pacemaker/corosync provides the cluster infrastructure. GFS2 is  a native file system that interfaces directly with the Linux kernel file system interface (VFS layer). For your information, Red Hat supports the use of GFS2 file systems only as implemented in the High Availability Add-On (Cluster).


Here is the list of activity  in an order to configure the GFS2 between two node cluster (Pacemaker).

  1. Install GFS2 and lvm2-cluster packages.
  2. Enable clustered locking for LVM
  3. Create DLM and CLVMD resources on Pacemaker
  4. Set the resource ordering and colocation.
  5. Configure the LVM objects & Create the GFS2 filesystem
  6. Add logical volume & filesystem in to the pacemaker control.  (gfs2 doesn’t use /etc/fstab).


Environment: 

  • RHEL 7.1
  • Node Names : Node1 & Node2.
  • Fencing/STONITH: Mandatory for GFS2.
  • Shared LUN “/dev/sda”
  • Cluster status:
[root@Node2-LAB ~]# pcs status
Cluster name: GFSCLUS
Last updated: Thu Jan 21 18:00:25 2016
Last change: Wed Jan 20 16:12:24 2016 via cibadmin on Node1
Stack: corosync
Current DC: Node1 (1) - partition with quorum
Version: 1.1.10-29.el7-368c726
2 Nodes configured
5 Resources configured

Online: [ Node1 Node2 ]

Full list of resources:

 xvmfence       (stonith:fence_xvm):    Started Node1
 
PCSD Status:
  Node1: Online
  Node2: Online

Daemon Status:
  corosync: active/enabled
  pacemaker: active/enabled
  pcsd: active/enabled
[root@Node2-LAB ~]#


Package Installation:

1. Login to the both cluster nodes and install gfs2 and lvm2 cluster packages.

[root@Node2-LAB ~]# yum -y install gfs2-utils  lvm2-cluster
Loaded plugins: product-id, subscription-manager
This system is not registered to Red Hat Subscription Management. You can use subscription-manager to register.
Package gfs2-utils-3.1.6-13.el7.x86_64 already installed and latest version
Package 7:lvm2-cluster-2.02.105-14.el7.x86_64 already installed and latest version
Nothing to do
[root@Node2-LAB ~]# ssh Node1 yum -y install gfs2-utils  lvm2-cluster
Loaded plugins: product-id, subscription-manager
Package gfs2-utils-3.1.6-13.el7.x86_64 already installed and latest version
Package 7:lvm2-cluster-2.02.105-14.el7.x86_64 already installed and latest version
Nothing to do
[root@Node2-LAB ~]#


Enable clustered locking for LVM:

1. Enable clustered locking for LVM on both the cluster ndoes

[root@Node2-LAB ~]# lvmconf --enable-cluster
[root@Node2-LAB ~]# ssh Node1 lvmconf --enable-cluster
[root@Node2-LAB ~]# cat /etc/lvm/lvm.conf |grep locking_type |grep -v "#"
    locking_type = 3
[root@Node2-LAB ~]#

2. Reboot the cluster nodes.


Create DLM and CLVMD cluster Resources:

1.Login to one of the cluster node.

2.Create clone resources for DLM and CLVMD. Clone options allows resource to can run on both nodes.

[root@Node1-LAB ~]# pcs resource create dlm ocf:pacemaker:controld op monitor interval=30s on-fail=fence clone interleave=true ordered=true
[root@Node1-LAB ~]# pcs resource create clvmd ocf:heartbeat:clvm op monitor interval=30s on-fail=fence clone interleave=true ordered=true


3.Check the cluster status.

[root@Node1-LAB ~]# pcs status
Cluster name: GFSCLUS
Last updated: Thu Jan 21 18:15:48 2016
Last change: Thu Jan 21 18:15:38 2016 via cibadmin on Node1
Stack: corosync
Current DC: Node2 (2) - partition with quorum
Version: 1.1.10-29.el7-368c726
2 Nodes configured
5 Resources configured


Online: [ Node1 Node2 ]

Full list of resources:

 xvmfence       (stonith:fence_xvm):    Started Node1
 Clone Set: dlm-clone [dlm]
     Started: [ Node1 Node2 ]
 Clone Set: clvmd-clone [clvmd]
     Started: [ Node1 Node2 ]

PCSD Status:
  Node1: Online
  Node2: Online

Daemon Status:
  corosync: active/enabled
  pacemaker: active/enabled
  pcsd: active/enabled
[root@Node1-LAB ~]#

You could see that resource is on-line on both the nodes.


Resource ordering and co-location:

1.Configure the resource order.

[root@Node1-LAB ~]# pcs constraint order start dlm-clone then clvmd-clone
Adding dlm-clone clvmd-clone (kind: Mandatory) (Options: first-action=start then-action=start)
[root@Node1-LAB ~]# 


2. configure the co-location for resources.

[root@Node1-LAB ~]# pcs constraint colocation add clvmd-clone with dlm-clone
[root@Node1-LAB ~]#


3. Verify the constraint.

[root@Node1-LAB ~]# pcs constraint
Location Constraints:
Ordering Constraints:
start dlm-clone then start clvmd-clone
Colocation Constraints:
clvmd-clone with dlm-clone
[root@Node1-LAB ~]#


Configure the LVM objects:

1.Login to one of the cluster node and create the required LVM objects.

2. In this setup , /dev/sda is shared LUN between two nodes.

3. Create the new volume group .

[root@Node1-LAB ~]#  vgcreate -Ay -cy gfsvg /dev/sda
  Physical volume "/dev/sda" successfully created
  Clustered volume group "gfsvg" successfully created
[root@Node1-LAB ~]# 
[root@Node1-LAB kvmpool]# vgs
  VG    #PV #LV #SN Attr   VSize   VFree
  gfsvg   1   1   0 wz--nc 996.00m 96.00m
  rhel    1   2   0 wz--n-   7.51g     0
[root@Node1-LAB kvmpool]#

4. Create the logical volume.

[root@Node1-LAB ~]# lvcreate -L 900M -n gfsvol1 gfsvg
  Logical volume "gfsvol1" created
[root@Node1-LAB ~]#
[root@Node1-LAB kvmpool]# lvs -o +devices gfsvg
  LV      VG    Attr       LSize   Pool Origin Data%  Move Log Cpy%Sync Convert Devices
  gfsvol1 gfsvg -wi-ao---- 900.00m                                              /dev/sda(0)
[root@Node1-LAB kvmpool]#

5. Create the filesystem on the new volume.

[root@Node1-LAB ~]#  mkfs.gfs2 -p lock_dlm -t GFSCLUS:gfsvolfs -j 2 /dev/gfsvg/gfsvol1
/dev/gfsvg/gfsvol1 is a symbolic link to /dev/dm-2
This will destroy any data on /dev/dm-2
Are you sure you want to proceed? [y/n]y

Device:                    /dev/gfsvg/gfsvol1
Block size:                4096
Device size:               0.88 GB (230400 blocks)
Filesystem size:           0.88 GB (230400 blocks)
Journals:                  2
Resource groups:           4
Locking protocol:          "lock_dlm"
Lock table:                "GFSCLUS:gfsvolfs"
UUID:                      8dff8868-3815-d43c-dfa0-f2a9047d97a2
[root@Node1-LAB ~]#
[root@Node1-LAB ~]#
  • GFSCLUS – CLUSTER NAME
  • gfsvolfs – FILESYSTEM NAME
  • “-j 2” = Journal- Since two node is going to access it.


Configure the Mount-point on Pacemaker:

1. Login to one of the cluster node.

2. Create the new cluster resource for GFS2 filesystem.

[root@Node1-LAB ~]# pcs resource create gfsvolfs_res Filesystem device="/dev/gfsvg/gfsvol1" directory="/kvmpool" fstype="gfs2" options="noatime,nodiratime" op monitor interval=10s on-fail=fence clone interleave=true
[root@Node1-LAB ~]#


3. Verify the volume status. It should be mounted on both the cluster nodes.

[root@Node1-LAB ~]# df -h /kvmpool
Filesystem                 Size  Used Avail Use% Mounted on
/dev/mapper/gfsvg-gfsvol1  900M  259M  642M  29% /kvmpool
[root@Node1-LAB ~]# ssh Node2 df -h /kvmpool
Filesystem                 Size  Used Avail Use% Mounted on
/dev/mapper/gfsvg-gfsvol1  900M  259M  642M  29% /kvmpool
[root@Node1-LAB ~]#


4. Configure the resources ordering and colocaiton .

[root@Node1-LAB ~]# pcs constraint order start clvmd-clone then gfsvolfs_res-clone
Adding clvmd-clone gfsvolfs_res-clone (kind: Mandatory) (Options: first-action=start then-action=start)
[root@Node1-LAB ~]# pcs constraint order
Ordering Constraints:
  start clvmd-clone then start gfsvolfs_res-clone
  start dlm-clone then start clvmd-clone
[root@Node1-LAB ~]# pcs constraint colocation add gfsvolfs_res-clone  with clvmd-clone
[root@Node1-LAB ~]# pcs constraint colocation
Colocation Constraints:
  clvmd-clone with dlm-clone
  gfsvolfs_res-clone with clvmd-clone
[root@Node1-LAB ~]#


5. You could see that both the nodes able to see same filesystem in read/write mode.

[root@Node1-LAB ~]# cd /kvmpool/
[root@Node1-LAB kvmpool]# ls -lrt
total 0
[root@Node1-LAB kvmpool]# touch test1 test2 test3
[root@Node1-LAB kvmpool]# ls -lrt
total 12
-rw-r--r-- 1 root root 0 Jan 21 18:38 test1
-rw-r--r-- 1 root root 0 Jan 21 18:38 test3
-rw-r--r-- 1 root root 0 Jan 21 18:38 test2
[root@Node1-LAB kvmpool]# ssh Node2 ls -lrt /kvmpool/
total 12
-rw-r--r-- 1 root root 0 Jan 21 18:38 test1
-rw-r--r-- 1 root root 0 Jan 21 18:38 test3
-rw-r--r-- 1 root root 0 Jan 21 18:38 test2
[root@Node1-LAB kvmpool]#

We have successfully configured GFS2 on RHEL 7 clustered nodes.


Set the No Quorum Policy:

When you use GFS2 , you must configure the no-quorum-policy . If you set it to freeze and system lost the quorum, systems will not anything until quorum is regained.

[root@Node1-LAB ~]# pcs property set no-quorum-policy=freeze
[root@Node1-LAB ~]#


Although OCFS2 (Oracle Cluster File System 2) can run on Red Hat Enterprise Linux, it is not shipped, maintained, or supported by Red Hat.

Hope this article is informative to you.

Share it ! Comment it !! Be Sociable !!!

The post RHEL7 – Configuring GFS2 on Pacemaker/Corosync Cluster appeared first on UnixArena.

Puppet – Configuration Management Software – Overview

$
0
0

Puppet  is an open-source configuration management / IT automation software that allows system administrators to programmatically provision, configure, and manage servers, network devices, and storage, in a datacenter or in the cloud. Puppet is written on RUBY language and it is produced by Puppet Labs.  Configuration Management tools uses either push or pull methods. Puppet uses pull method. In this method, puppet agents will be running on all the hosts and these machines call in to the puppet master to see if there is any new instructions for them. If there is any configuration for the hosts , puppet client daemon, just applies to it.


Puppet Components:

  1. Puppet Master
  2. PuppetDB and PostgreSQL
  3. Console
  4. Agents


Puppet Master (which includes Puppet DB  & Console ) can be installed on only on Linux systems.  Here is the supported platforms.  Refer Puppet Labs for more information.

Operating system Version(s) Arch
Red Hat Enterprise Linux 6, 7 x86_64
CentOS 6, 7 x86_64
Oracle Linux 6, 7 x86_64
Scientific Linux 6, 7 x86_64
SUSE Linux Enterprise Server 11, 12 x86_64
Ubuntu 12.04, 14.04 x86_64


Puppet agent can be installed on most of the  Linux , Unix and windows platforms.

Operating system Version(s) Arch
Red Hat Enterprise Linux 4, 5, 6, 7 x86_64 (i386 for 5, 6)
CentOS 5, 6, 7 x86_64 (i386 for 5, 6)
Oracle Linux 5, 6, 7 x86_64 (i386 for 5, 6)
Scientific Linux 5, 6, 7 x86_64 (i386 for 5, 6)
SUSE Linux Enterprise Server 10, 11, 12 x86_64 (i386 for 10, 11)
Solaris 10, 11 SPARC & i386
Ubuntu 10.04, 12.04, 14.04, 15.04 x86_64 and i386
Fedora 22 x86_64 and i386
Debian Squeeze (6), Wheezy (7), Jessie (8) x86_64 and i386
Microsoft Windows (Server OS) 2008, 2008R2, 2012, 2012R2, 2012R2 core x86_64
Microsoft Windows (Consumer OS) Vista, 7, 8, 8.1 x86_64
Mac OS X 10.9, 10.10, 10.11 x86_64
AIX 5.3, 6.1, 7.1 Power


Puppet Software:

Puppet Labs offers two type of software.

  • Puppet Open Source  (Free )
  • Puppet Enterprise  (Free only up to 10 Nodes/Commercial )

Puppet Enterprise comes along with rich web-based GUI to ease the administration.


Type of Installation: 

  • Monolithic Installation
  • Split Installation


Monolithic Installation: 

In Monolithic installation , Puppet master , Console and Puppet DB are installed on one node.  Using single Puppet Master node , you can manage up to 500 nodes.

Puppet Monolithic Installation


When you want to scale out the puppet infrastructure, you can simply add compile master(Additional Master node) to the exiting infrastructure. Each compile master can help you to manage additional 1500 Nodes. Monolithic installation might lead to performance issues when the number agent nodes get increases.  When the environment grows large , you might need to think of migrating to the split installation method to improve the performance.

Puppet Monolithic Installation with Compile Masters


Split Installation:

In Puppet enterprise split installation, Puppet master, console, and PuppetDB are installed on each one separate nodes.  This installation is suitable for managing up to 7000 nodes with additional compile masters and ActiveMQ message brokering.

Puppet Split installation


The below architecture shows the large puppet environment using split installation method.


Large Split Installation


Source: https://docs.puppetlabs.com


Is Puppet Master deprecated ? 

Yes. puppet server is replaced Puppet master environment. Puppet Server is an next-generation alternative to the Puppet master. Puppet Server is written in Clojure, and is built on our open source Trapperkeeper framework. According to puppet labs , Puppet server provides 3x better performance than existing puppet master environment. See more details here.


Alternatives to Puppet:

Here is the list of puppet alternative software.

  • Ansible (Redhat)
  • Salt
  • Chef


Hope this article is informative to you . You will see many more articles on puppet soon. Follow UnixArena on Facebook.Twitter to get regular updates.


Share it !  Comment it ! Be Sociable !!!

The post Puppet – Configuration Management Software – Overview appeared first on UnixArena.

Viewing all 369 articles
Browse latest View live


<script src="https://jsc.adskeeper.com/r/s/rssing.com.1596347.js" async> </script>